Category: How to

WordPress is a favorite blogging tool of mine and I share tips and tricks for using WordPress here.

  • How to Automatically Close Inactive Safari Tabs on Your iPhone or iPad?

    How to Automatically Close Inactive Safari Tabs on Your iPhone or iPad?

    The most awaited iOS 13 is finally here. Apple has launched its new iOS version with a lot of great features, especially on its in-built Safari browser. Now you can close inactive Safari tabs automatically after a specific period of time, which you can choose. Hence, there is no need to worry about tabs, which you forgot to close on your Safari browser.

    How to Automatically Close Inactive Safari Tabs on Your iPhone or iPad

    The very own, Safari browser now comes with an auto-close tab option. It means you can set the day, month, or week as per your own preference if you want to close inactive safari tabs automatically. Read on to know more.

    Applying Auto Close Tabs in Safari on iPad or iPhone

    Keep in mind that this feature is more than just for iPhone having iOS 13, including iPad devices running iPadOS 13. Let’s take a look at the detailed steps to make this feature work –

    Applying Auto Close Tabs in Safari on iPad or iPhone

    • First of all, go to Settings on your iPad or iPhone.
    • Now go to the Settings menu and click on Safari
    • Now you have to go down to the tab section.
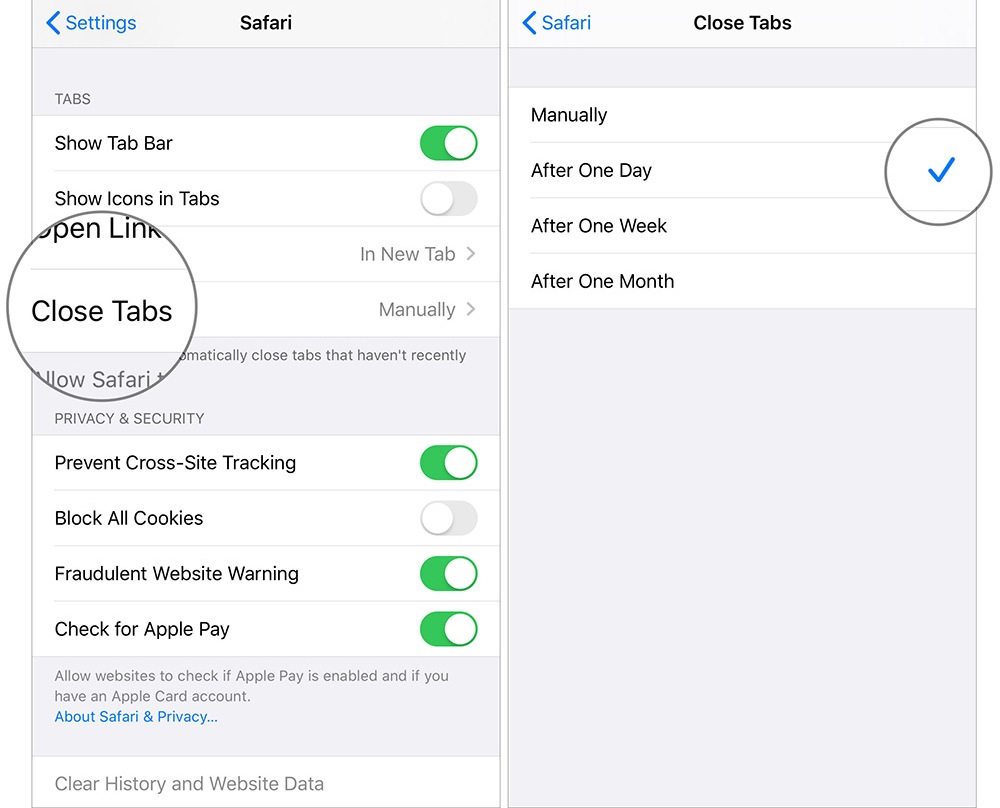
    • On this list, select the Close Tabs option.
    • Choose the duration to close the inactive tabs later on.
    • There are options like After One Month, After One Day, or After One Week.
    • After selecting the desired option, you are good to go. It will enable the automatic close tab option on your iPad or iPhone.

    What Else you should know about Tabs in Safari?

    A web browser cannot complete without its tabs, and Apple’s Safari is no exception. Actually, Safari has come a long way with its tabs, since its humble beginning. However, there’s a lot more you should know about them. Let’s take a quick look at all the features you should know to master the tabs in the Safari browser.

    Opening, Pinning and Closing Tabs

    It is very easy to learn the basics of the Safari tab, just like Google Chrome in different ways.

    • Tap the small + sign on the right side of Tab Bar to create a new tab or hit Command+T on the keyboard.
    • Click the X button to close the tab on the left side or use “Command+W” keyboard shortcut
    • If you have multiple tabs opened, you need to do something more. You can rearrange the tabs by dragging them around the Tab bar or drag out the tab to open in a new window.
    • In order to merge separate windows into one window, click “Merge All Windows” on the Window menu.
    • Open the options by right-clicking on a tab. The options are important to note though they are not. You can move or close the active tab to the new window like dragging it off the Tab.
    • If you have a lot of open tabs and you don’t like to close each tab separately, right-click on the tab and choose the option “Close other tabs”. In case you close a tab by mistake, you can restore the one by pressing the keyboard shortcut “Command+Shift+T”. You can also press the combination “Command+Z” to restore the last action.
    • Even if you reopen and close Safari, pinned tabs will always stay there, unless you unpin or close the tabs. It is also nice to keep tabs active, which are widely used as your email.
    • To mute an unwanted tab, click the speaker icon. Click on the blue speaker icon to silence all tabs in the location bar.
    • When it comes to open tabs, you can arrange them all in a grid. Click the “Show all tabs” button on the upper right section or “Command+Shift+\” key combination.
    • Right-click on the tabs to pin them. It creates smaller tabs on the left of Tab Bar.
    • There are several other tab tricks for Safari. Choose “Open in New Tabs” to open everything in the folder by right-clicking on the bookmark folder. By selecting the option “Automatically Replace Tabs”, everything inside it will be opened on Tab bar.
    • Right-click on the folder and uncheck this option when it comes to restoring the same to right operation.
    • To hide the Tab bar temporarily, select “Hide Tab Bar” by clicking the View menu.
    • Before creating a new tab, the Tab Bar will be hidden. You may want to hide it by going to the View menu.

    Choosing what Appears when Opening a New Tab


    managing tabs on safari

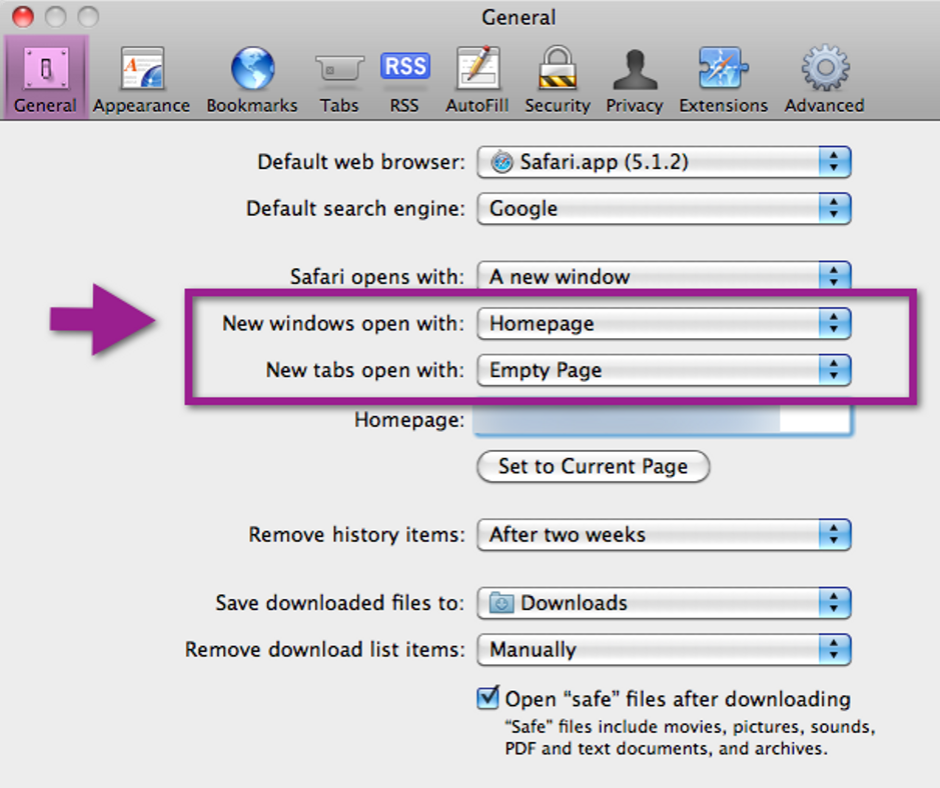
    • Open Preferences from Safari menu or hit the keyboard shortcut “Command+” to change the tab behavior of Safari.
    • Configure Safari to launch new tabs in General preferences to your Favorites page, Homepage, Top Sites, empty page, or same page. If How-To Geek has been opened, new tabs will open with it.
    • You can choose when you want to open new pages in tabs in Tan Preference rather than windows –
      • Automatically – Links can open in new windows rather than opening in new tabs.
      • Never – If you want links to open in a new window, it will launch in a new window.
      • Always – Links can open in new windows, even the ones coded to open in their specially formatted and separate windows.

    Here are the options for you to change the pattern of opening a new tab –

    • Enable/disable Command+Click and open links in new tab.
    • The link will be active if you click the same and it opens a new tab or window
    • Disable or enable tab switching through Command+9 to Command+1

    You can disable all the other shortcuts by disabling Command+Click as well as their modifiers at the bottom of Tabs preferences.

    Use Extensions to Get the Most of Tabs

    safari extensions

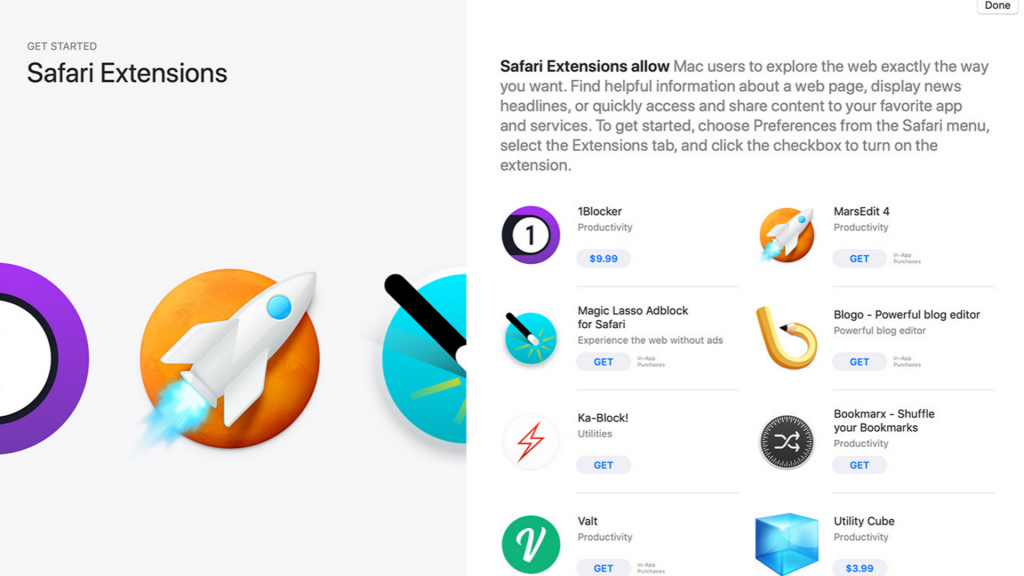
    You can use several tab extensions that can help you add emoji to the tab titles you like, save the whole tab session, and also keep a record of tabs you have closed recently. You might definitely find something that might help.

    Bottom Line

    As discussed, you can do a lot more with tabs than what you can expect on the Safari browser. You can memorize a few keyboard shortcuts and learn the tabs to do repetitive tasks faster.


  • How to Use Google Pixel Night Sight?

    How to Use Google Pixel Night Sight?

    Since the launch of Pixel 3, Google announced Night Sight, a completely new photo mode. But it didn’t come with new devices. Now the Pixel will change the photo-capturing in low light. Google Pixel devices are well regarded for their prowess in photography.

    How to Use Google Pixel Night Sight

    The Night Sight mode is one of the best tools out there for their Camera app when it comes to low-light photography. However, Night Sight mode is not easy to find in the camera of your Pixel phone. You can find it in the “More” section in this app. Google is all set to come up with Night Sight mode in the main camera section.

    Latest Update

    According to 9To5 Google, the early version of Android Q was leaked recently and had improvements in gesture control. It is also added in the major update to Google Camera. The Android Beta 5 build introduced the Night Sight to Pixel phones in the main interface. The Panorama mode is now replaced by the Night Sight in the main interface. Therefore, the users can easily tap on Night Sight option on the camera app.

    Latest Update

    The users can now find the Panorama mode in place of Night Sight, which means they have to tap on the “More” icon. The Panorama mode option will be placed along with other options like Photobooth and Photo Sphere. Along with it, the next update of the Camera app will also get rid of the color balance controls. The users will no longer have a Thermometer option in any mode. Well, there are some other changes Google is going to make in its Camera app. Along with all these features, everyone’s favorite Flash will change to Illumination to brighten the face on the front camera.

    With that said, Google is yet to announce officially, as to when these changes will be seen in Google Camera. According to the report, Google might introduce Camera 6.3 with the official rollout of Android Q or as a Play Store update.

    What devices are the first to get Night Sight?

    The best thing is that this technology is no longer limited to the latest devices. Google is trying to be quite generous and going to make Night Sight a great feature for all Pixel devices –

    1. Pixel
    2. Pixel 2
    3. Pixel XL
    4. Pixel 2 XL
    5. Pixel 3
    6. Pixel 3 XL

    Even better, you will be able to use the Night Sight on both rear and front cameras. Therefore, no one will stop you from making some cool selfies even in low light.

    Release Date of Night Sight on Pixel Phones

    According to Google, the update will be released on November 14, 2019. Well, there is no specific date and time for the update to reach your phone. It depends upon the device as well as location. However, the Camera app will get a small update first before making Night Sight work. Google will roll out the update on November 16 in the UK.

    How does Night Sight work?

    According to Google, Night Sight is all about machine learning and AI to give you the best results even without using a DSLR and tripod. The technology is very similar to the same on Mate 20 and Huawei P20 devices using different shots and combining the same with AI to ensure proper color balance and to control shaking.

    How does Night Sight work?

    Here’s how it will work –

    • Motion Detection – The Night Sight is capable to detect motion both in movements and handshake in the picture. In terms of long exposures, motion is an issue as it makes the photo blur. Night Sight is capable to optimize the process of photo capturing as it can detect motion before even taking the photo to give you sharp picture and low noise.

    It is capable to use longer exposure by keeping the phone steady and get more light without any blur. If there is more movement or shake, it uses shorter exposures and merges the results to reduce any motion effect. It does the work of merging photos very beautifully. It picks out the details by merging snaps in different settings and giving the final image. You just have to press the button and you can get your pictures. All such things are automatic. Even if your hand is shaky, you can still get the best results.

    • Rebalance Color using AI – The low light or night pictures usually do not look natural. They also turn red or yellow or add a warm cast, which is completely unnatural. This is where machine learning takes place. It has already learned how to keep things as they are. Therefore, they are more rebalanced to give you more realistic results, but without making it low-light and poor snap. Google is planning to take a photo, which looks the way it is seen with bare eyes. If it is possible, you will be able to capture a night shot which looks natural, instead of a blurry noise.

    Using Night Sight on Google Pixel

    By opening the camera in lower light on your device, it will ask you to use Night Sight automatically on the viewfinder. Also, you can easily go to Night Sight by tapping on it.

    Using Night Sight on Google Pixel

    You can easily find the Night Sight in shooting modes by going to the “More” section on your phone. You just have to push the shutter button and it starts capturing in the Night Sight mode. It will take some time to process.

    If it is dark out there, you might want to tap to focus on the object and you will have to find something manually to add contrast so your camera can capture the image.

    Tips to Learn Using Night Sight

    Here are some of the tips by Google to get the most of Night Sight –

    Tips to Learn Using Night Sight

    • Motion – Ask subject to stay still for a few seconds while pressing the shutter button.
    • Focus – Tap around and on the object before clicking the shot. It helps the camera to focus when it comes to taking pictures in dark conditions.
    • Stability – Prop the device over a stable surface. Keep the hand steady so it can focus on the sharpness and light to process.
    • Bright light – When capturing in Night Sight mode, avoid any source of bright light or it will add unnecessary reflections in the picture.


  • Change Your Android 10 System Accent Color

    Change Your Android 10 System Accent Color

    The system-wide dark theme is finally here with the launch of Android 10 for the first time in the history of Android OS. Well, it is not enough. You can also change the android 10 system accent color for the first time.

    Change Your Android 10 System Accent Color

    When you go deep into the more advanced Developer Options, you can even change the accent color of icons by choosing one of 8 colors available. In this guide, we will discuss how to change accent colors in Android 10 and what else you can change.

    Accent Color Options in Dark and Light Mode Themes

    Ocean Blue is quite common but there are different types of theme colors for you to choose from, preferably on the cooler side of the color range. On the light theme, most colors seem to be more bright and bold. In the dark theme, some colors feel more pastel and lightening but Ocean is darker and deeper in light theme. When the dark theme is enabled, Black turns out to white. Therefore, here are the color options available for both themes –

    Accent Color Options in Dark and Light Mode Themes

    • Blue (default)
    • Cinnamon
    • Ocean Blue
    • Green
    • Black
    • Orchid
    • Purple
    • Space

    Steps to Change Accent Color in Android 10

    In the previous versions of Android, you could not do anything with default accent color on your device. However, Android 10 is finally here with an option to choose from different accent colors in the Developer Preview. Currently, you can choose from 8 different accent colors. Here are the steps to find them –

    Steps to Change Accent Color in Android 10

    • First of all, go to Settings on your device.
    • Scroll down and go to About Phone” section.
    • Go to Android version.
    • Tap on Build Number, which is displayed for seven times. After doing that, you will see a message that you are officially a Developer.
    • Go to Settings again.
    • Go to System option.
    • Tap on Advanced option.
    • Tap on Developer Options.
    • Scroll down and select Accent Color option on the menu.
    • It will show you seven different colors to choose from. Select the one and enable it to change the color.

    So, these were the steps to change the accent color on your Android 10 system.

    Steps to enable Dark theme by going to Settings

    • Simply go to Settings
    • Tap Display
    • And then select the Dark theme and toggle it on.

    Steps to enable Dark theme by going to Settings

    Adding Dark theme to Quick Settings

    There is no need to go to Settings whenever it comes to turning it on or off if you add the same to Quick Settings. By default, it is not added. But you can do it in 3 steps –

    Adding Dark theme to Quick Settings

    • Open Quick Settings by pulling the top of the screen down two times.
    • In the bottom left corner, tap the pencil button in the left bottom corner in Quick Settings shade.
    • Drag and drop Dark theme toggle from the bottom in Quick Settings button.

    Steps to change icon shape

    Android 10 is officially launched by Google for Pixel devices. Here are the detailed steps to change icon shape –

    Steps to change icon shape

    • In Android 10, you have to go to Settings.
    • Tap System
    • Go to Advanced
    • Go to Developer Options
    • At the end of the page, tap icon shape under Theming
    • Now you can choose from Teardrop, Device default, Rounded Rectangle, or Squircle

    Steps to change font style

    • The open app drawer and open Settings app
    • Select System option
    • Select Advanced
    • Go to Developer Options
    • Go to Theming section at the end and select Headline/Body font
    • Now you can choose from Noto serif/Source sans Pro or device default.
    • Choose font style in devices supporting Android 10.
    • Swipe down in Quick Settings to turn on Dark theme or disable when needed.

    What Else you’ll Discover?

    There have been leaks we have found related to Google Pixel 4 and we have another leak for you. It has come from the dedicated team of XDA Developers. They have finally managed to get a quick look at the upcoming Pixel Themes app by adding some code.

    The roll-out of Android Q beta was the first time when Pixel Themes were discovered. Nevertheless, it is yet to be officially available in Android 10 final release. Meanwhile, we are first going to see it with the official launch of Google Pixel 4.

    There are some strings in AOSP source code on Android 10. You can now customize the lock screen with the completely new ThemePicker, grid size for the home screen, ambient display clock face, and even more. The app shows “Styles & Wallpapers” after installing it in the app drawer. You can also find it by holding on the home screen.

    UI screen Manager

    The UI screen of the theme manager is displayed through Google Photos album. A developer luca020400 from XDA Developers spotted the link, which was added to a commit mistakenly, and he uncovered the same.

    XDA had also revealed the update that the clock face options on Android 10 will include Bubble, Analog, and Typeface options to choose. However, during the phase of development, Typeface has been removed. Later on, it was added back manually in the screenshots shared by luca020400 when he could get it working on his device.

    While the latest screens are yet to be seen, the XDA-Developers have also shared some of the older screenshots, which reveal that the UI of Android 10 has something more to discover. The images have the codenames before choosing the final names of themes.

    Along with the upcoming Pixel Themes, we have also got a sneak peek into some of the cool new features in Pixel 4. The astrophotography mode is one of the biggest reveals in a leaked video online. You can also find a Coral color option.

    Bottom Line

    We hope this guide will help you in changing the android 10 system accent color, adjust the font style, and icon shape. All these things are done system-wide. You can choose from Collage, Crayon, and Ash option. You can also mix and match on your own with a customization feature of My Style.