Category: How to

WordPress is a favorite blogging tool of mine and I share tips and tricks for using WordPress here.

  • How to Set a Custom Name and Profile Photo

    How to Set a Custom Name and Profile Photo

    You can set your display picture and profile name in most of the popular messaging apps like WhatsApp. Well, iMessage on iPad and iPhone was the only app that left without this feature until the rollout of iOS 13. If you have been missing out on this feature, it’s the best time to set a display picture and a custom profile name on iMessage. With the latest iOS release, you cannot just set your display name, but can also set a display picture from your gallery or even use Animoji or Memoji if you like.

    How to Set a Custom Name and Profile Photo with iMessage on iPhone and iPad?

    Keep reading as we will tell you about setting a profile photo and custom name in iOS 13 on iMessage.

    Setting a profile photo and name on iMessage

    Keep in mind that you will get a pop-up screen automatically asking you to set up your display picture and the custom name just after updating iPhone or iPad to iOS 13 and opening the Messages app.

    You can do it easily by following the on-screen steps. In case you missed this step, here are the steps to do so:

    How to Set a Custom Name and Profile Photo with iMessage on iPhone and iPad?

      • Tap on the 3-dots icon on the top when you open the Messages app. Tap “Edit Name and Photo”.
      • You can create a Memoji if your latest iPhone supports the same. Or you can skip this step and go to the next screen. Now you can set your profile picture for the first time. Simply select “Choose Name and Photo” to do that for the first time. If you have set up your name and photo, go to the next step.
      • You can now choose a picture from your photo gallery. Simply tap the “All Photos” option or “Camera” icon to click the selfie. You can also choose a Memoji or Animoji. Once you have decided your option, simply tap “Done”.
      • You can now find a pop-up that will ask if you would like to use a specific picture in your My Card and Apple ID in your contacts. You can skip it by selecting “Not Now” or do it by tapping “Use”.
      • Once you have set up your profile picture, enter your first and last name. It is not important to enter a real name. For example, if you want to add a different name like “Phoenix”, you can do it so.
      • You can also share your photo and name with specific people. You can choose from two options – Always Ask and Contacts Only. Well, “Always Ask” is better if you have privacy concerns. All those options are available at “Settings> Messages> Share Name and Photo”.

    What’s New in iOS 13 for Animoji/iMessages?

    • Share name and DP

      – You can share a name and photo with the other person you know when starting a conversation. You can choose whether you want to share it with everyone, contacts or no one at all. You can also use an image, Animoji or monogram.

      How to Set a Custom Name and Profile Photo with iMessage on iPhone and iPad?

    • Improved Search

      – You can easily search what you want in Messages. Even before typing a character, you can see people, recent messages, links, photos, and locations you want.

    Memoji stickers

    – It generates sticker packs automatically on the basis of Animoji and Memoji characters to show a range of emotions.

  • How to Make YouTube Safer for Your Kids?

    How to Make YouTube Safer for Your Kids?

    If you were a 90s kid, there were limited sources of entertainment like television, radio, etc. We used to just wait to get home back from school and turn on the idiot box. Today’s kids want more than just television and YouTube is one of the biggest addictions. Therefore, its time to take one step ahead and make YouTube safer for your kids.

    How to Make YouTube Safer for Your Kids

    Basically, YouTube allows children above 13 years old to sign up for an account. But parents create accounts for their children and even allow them to use their own accounts.

    According to a survey by Common Sense Media, kids under 8 years old spend up to 48 minutes a day on their mobile devices and spend around 2 hours and 19 minutes of screen time.

    Of course, YouTube comes up with some innovative content. You can search for almost everything you need. However, like everything else in the world, there is a dark side of YouTube. Anyone can come across videos with hatred, profanity, and even vulgarity.

    To try and remove such types of inappropriate content that could be harmful to the mental state of young people, YouTube is taking some major steps.

    In order to add filters that can handpick videos especially for kids, they have launched YouTube Kids. They have also removed monetization from channels that post adult content and removed the incentive for marketing.

    Furthermore, Here is how to make YouTube safer for kids

    Create a Family Account

    If your child is younger than 12 years, you can also set up a YouTube family account to protect your kids from inappropriate content. You have to create a new Gmail account and accomplish this goal by creating the YouTube account with the same account.

    How to Make YouTube Safer for Your Kids

    With a family account, you can create playlists of the right videos and subscribe to them to only family-friendly channels. You can see what kinds of videos your kids are watching in the history list on the left and you can keep track of their viewing activity on the go.

    You can add some other layers of protection to ensure the safety of your account and make YouTube safer for your kids–

    • Pause the Watch History and turn off Search option. With these actions, YouTube won’t gather any information from videos your child wants to watch.
    • Turn Restricted mode or Safety mode on. If the same YouTube account is used by the family on different browsers, do it to all of them. Simply go to the bottom.
    • Lock the safety mode using login details to protect the same.
    • Flag inappropriate videos for better protection. YouTube uses its own algorithm to keep track of these notifications.
    • When reporting the video, it will be blocked automatically from your YouTube channel.
    • You can also turn off the Autoplay option if you don’t want your kids to access inappropriate content. It can keep YouTube from playing videos automatically.

    Parental Control

    You cannot expect YouTube to block every content that your child shouldn’t watch. Only parents can add that important filter for their child.

    You are solely liable to talk to your kids and make things clear before allowing them to use this platform. Let them know that you are monitoring their viewing pattern.

    Make YouTube Safer for Your Kids Parental Control

    • Check their device on a timely basis. Check their watch history. Be careful if you find it empty. There are chances that they are removing their watch history because they don’t want to get caught.
    • On every browser and app, your child uses, enable restricted mode on them.
    • Be sure to talk to your kids regarding what they should do if they see any inappropriate content and what would happen if they don’t follow the rules.
    • Keep their login credentials handy.

    Secure Personal Account

    When your child reaches their tweens, they may start to refuse using a family account and get angry on being limited to only those playlists you throw at them. Here are some of the ideas to let them use their own YouTube account safely –

    • You may use a network service like Cisco’s OpenDNS for another layer of security and content filtering.
    • You can use some online filtering programs like McAfee Safe Eyes or Norton Family Premier to know whenever your child is watching objectionable content and block them right away.

    Block or Report Offensive Content

    If your child ever comes across a disturbing content, you can simply block the same to keep it from being featured again. You can report the video as offensive.

    The team behind YouTube Kids always keeps track of flagged videos all the time. You can both report and block the videos that seem offensive to your kids.

    Simply tap the triple-dot button and block the video by tapping block. You can also block the video that is being played. You can also block the entire channel if the publisher seems to be fishy.

    Tap the triple-dot button to flag the video which is being played and tap Report. You can also select the reasons like inappropriate visuals, inappropriate audio or other before reporting.

    Limit Your Kids’ Screen Time

    With these steps, you can limit the screen time for your kids to watch videos on YouTube using YouTube Kids app

    Limit Your Kids’ Screen Time

    • Launch the YouTube Kids on iOS or Android.
    • On the bottom right, tap the Lock icon and enter the password.
    • Tap Timer.
    • Set a time limit from 1 to 60 minutes. Tap Start Timer once done.

    Uploading Videos to YouTube

    The major difference between the TV we were glued to in childhood and today’s YouTube is that you can upload your own videos on it. At a young age, a lot of kids are intrigued to start their own YouTube channel and create their own videos.

    However, uploading videos can also bring disastrous results as they are unsupervised. When uploading video, kids risk their identity, location, and other private data. If they can’t resist –

    • Work with them and do it discreetly and safely.
    • First of all post videos privately. By doing it, people have to use the link to watch your videos like family members and watch the video. It won’t make it public.
    • Disable the comments until they get older enough to use as a teaching tool.

    Bottom line

    To all the parents, you should always keep these questions in mind- Are your kids using YouTube? Are you keeping track of their usage? Consider the risk if you are still not monitoring them. Hence it is time to make it secured. We hope you like our guide on how to make YouTube safer for kids.

    Please share your view with us, we will be happy to hear from you.

  • How To Unzip Files On Android Devices – All Apps And Features

    How To Unzip Files On Android Devices – All Apps And Features

    ZIP files are a way of sending more than one file. It could be considered as a compact digital package. However, to send or receive it and look at it, you will require special software or app. You would first have to unzip the file on your Android device and only then would you be able to look at the content. In most cases, the apps are third-party so it should work on your Android device, regardless of its manufacturer.

    What Are ZIP Files Used For?

    Before looking at how you could efficiently unzip files on Android devices, you first should know what ZIP is used for and how is it useful. ZIP files basically bunch many files together under one folder, making it easier to share, send, or receive it. Manually downloading or sending files could be tiresome and end up messing up your careful organization. ZIP files are a far better solution. RAR files are a similar format. It might help to know that software or apps that can extract files from ZIP folders can also unzip RAR files. Usually, these apps send an alert or a notification when they are done, but if you do not want them, you can turn off the notifications.

    How to Unzip Files on Android

    Let’s take a closer look at the process. ZIP files generally need to be unzipped before it can be used. This refers to the extraction of all the files from the compressed folder. Did you know that thanks to a recent update, unzipping can be now done by Files by Google app? If this doesn’t work for you, you can always use the other equally efficient apps. For more, check out the apps here. We will also be discussing some popular ones in detail in the next section.

    Unzip Files On Android Devices
    Unzip Files On Android Devices

    To unzip using Files by Google, you will first have to install the same by visiting the Play Store. Previously, it was known as Files Go. If you have an old Android device which has not undergone any updates, you might still have it under the same name. It is advised that you update before following the process.

    The Process

    Open ‘Files by Google’ and search for the ZIP file that you want to unzip. A hint: if the ZIP file you want to unzip was downloaded from your Gmail or another website, it could be there within the Downloads folder. It is quite easy to identify a ZIP folder since they always come with the .zip extension.

    Click on the file and you will see the various files present within the compressed folder. Tap ‘Extract’ to unzip these files. Once the process is done, you will see the list of unzipped files. Click on Done. You will find these files on the same location as the original ZIP file.

    Apps to Unzip Files on Android

    Let’s take a look at some of the popular Android apps. Some of these are file managers having built-in unzipping function, making it easier for you to do multiple tasks with just one app. They work in a manner similar to Files by Google.

    WinZip

    WinZip is a popular software and known by most of us. It is now available for Android as well. The WinZip app supports all the commonly used types of archive files. The best thing about it is that there is support for Dropbox and Google Drive. Once WinZip added this support, many others started duplicating it as well. The design is neat and clean with the user interface being pretty friendly. While it offers the basic functionality and does its job quite well, the others on this list seem to have more to offer.

    Unzip Files On Android
    Unzip Files On Android
    B1 Archiver

    B1 Archiver is a popular software used for unzipping or zipping up different archive files. While it offers support for ZIP and RAR, the most common types, the app also offers support for other 37 formats! If you work with uncommon archive formats, this is an excellent platform to use. Besides this, it also has support for multi-part RAR. With reliable functionality and a user-friendly design, this is a good option to consider. While it is free to use, if you want access to some of the more advanced features, you will have to pay a small fee for it. This will also stop the adverts.

    RAR

    RAR is a product from RARLAB. This was designed by the same people who created WinRAR. Considering their expertise, it only stands to reason that the app will offer support to different file types and contain more features. As guessed correctly, RAR for Android offers support for ZIP, RAR, 7z, TAR, and many more. You can also secure your files using the many options available, such as encryption or password. With RAR for Android, you can also repair damaged archives. In addition to this, you would also be able to compare the archives against benchmarks.

    ZArchiver

    This is a completely free tool and has been an Android staple for many years now. With easy user interface and controls, it is quite popular with its users. Since it supports many file types, it offers a good enough experience as well. There are also options for password protection, encryption, split archives, and more. While it does not have any fancy features or a stunning interface, it does its job efficiently and that is what we are concerned with.

    MiXplorer Silver

    Coming to the last app on our list – MiXplorer Silver. This file manager app offers basic archiving functions. If you are working only with basic file types, such as ZIP or RAR, this should suit your purpose quite well. Besides ZIP and RAR, it supports over two dozen file types. The major benefit here is that it also offers its services as a file manager in addition to its archival abilities. With all it offers, it doesn’t come for free. The price is slightly on the higher side, however, for the quality and the number of features it has, it is well worth it. MiXplorer Silver is also reliable and efficient, making it a good investment.

  • How to Send GIFs on Android?

    How to Send GIFs on Android?

    Sending GIFs on Android

    GIFs are an amazing way of expressing your feelings without any words. GIFs are moving images that play in a loop, expressing a variety of sentiments accurately. If you are an Android device user, you are in luck as there are several ways of sending GIFs. You could use your stock keyboard, a messaging app, or any popular third-party GIF app. Let’s take a look at these in detail. You can send GIFs from your Android device – meaning that the device needs to run on Android, regardless of who the manufacturer is.

    Gboard or the Google Keyboard

    On Android devices running on Android 7.1 Nougat, you can easily send GIFs from your Google Keyboard. All you need is a compatible messaging app. Android Messages ticks the box very well. If you want to check which Android OS you are using, you can do that in a jiffy. Make your way to the Settings Menu and click on ‘System’. Find the ‘About Phone’ section and scroll down to see the version. You can also update your Android by checking for the latest updates under the ‘System Update’ tab.

    How to Send GIFs on Android
    How to Send GIFs on Android

    Let’s move on to see how you can send a GIF using the Gboard and via your Android Messages. Open up Messages and create a new conversation. If you want, you can open an existing thread as well. Tap on the text message bar and the keyboard will show up. You will notice a smiley icon on the left side of the space bar. Tap on this.

    You will notice the GIF option at the bottom of the screen. Tapping on that will take you to a GIF search page. Simply type in a keyword and the relevant GIFs will appear. Once you start using this, you will notice that the Recent tab shows GIFs you have used in the past. Change the search terms to get more options. Once you find what you were looking for, tap on it and send it.

    Using GIPHY

    Most of us are likely to have heard of GIPHY. It is a library of such videos with an effective search engine that allows you to find what you were looking for easily. The best part about this is that you can also upload your own GIFs. Unless you want to save favorites or more, you don’t require login credentials. It is completely free to browse, search, and share GIFs.

    To send a GIF with GIPHY, first launch the app. On the main screen, you will many popular GIFs, the latest trending ones, and more. Tap on the planet icon to be presented with the many categories. This includes memes, reactions, greetings, animals, and occasions. If you want to upload your own GIF, tap the plus symbol. When you find a GIF you like, tap on the image.

    A variety of options will show up, such as Facebook Messenger, WhatsApp, Snapchat, and more. Depending on how you want to share, click on the relevant one. In addition to these, there will also be a share and a download link. With the share button, you can send using Android Messages and other similar apps. Once you have selected the app, tap send.

    GIFs on Android
    GIFs on Android

    Did you know that you could send GIFs in the form of an attachment as well? If you have saved GIFs on your Gallery or the cloud, you can easily do this. Simply tap the plus symbol beside the message bar. Select the GIF that you wanted to send and send. Before sending, you could also add a message if you want.

    Other Third-Party Apps For Sending GIFs

    GIFs can help us express our emotions better than anything. There are many amazing apps out there that offer tons of entertaining GIFs. If nothing is to your liking, you can get down and create your own! Let’s take a look at some of the most popular apps. Check here for more details.

    GIF Keyboard by Tenor

    This app makes sharing GIFs very convenient and super fun. The reason for this is that you don’t require any additional workups. You can do everything you need to do directly from your keyboard. Tenor has a HUGE library containing millions of short videos and GIFs. All you need to do is to search against the relevant keywords and find an amazing variety show up. With Tenor, you can search and send GIFs, emojis, and more. You will also find plenty of clips from movies in the form of GIFs.

    Fleksy

    Flesky was initialed designed and developed for faster and better typing. One of its major goals was predictive typing. Thanks to its Flesky next AI, the app suggests stickers, GIFs, words, and emojis while you are typing. Its auto-correction feature is also pretty advanced. Definitely more so than others you might have come across. The app has a pretty good collection of cool stickers, fun GIFs, and an interesting variety of emojis. Since it helps with fast typing, it also helps send GIFs easily. This app has an emoji and GIF keyboard, which allows you to easily access its large collection of GIFs, stickers and emojis. It’s a faster and more convenient way of sending GIFs on Android.

    SwiftKey Keyboard

    This is one of the more popular ones. The SwiftKey Keyboard app is known for its rich plethora of options it offers to the users. Did you know that this app works to understand your way of writing and then gives suggestions based on that? It also tries to understand how you use and interact with emojis, GIFs, different words, and reactions. Here, you will find tons of stickers, GIFs, videos, emojis, and more. In fact, there is a built-in emoji keyboard as well. Another surprising feature of SwiftKey Keyboard is that it supports a multilingual keyboard.

    Wrapping Up – How to Send GIFs on Android?

    GIFs are a great way of communicating. With these apps or via Android Messenger, there are plenty of ways how you can send GIFs on Android.best way to send gifs on Android. Whew! Now, do you want to chill out by playing some games? Check out some offline game ideas.


  • Fortnite Map Wiped Out By Black Hole to Mark

    Fortnite Map Wiped Out By Black Hole to Mark

    A huge asteroid has hit the whole Fortnite map and turned it into a black hole on Sunday, October 13. The whole map has been removed in his event and made the game inaccessible to millions of players. Instead, they have seen a strange live stream of the collision.

    Fortnite Map Wiped Out By Black Hole to Mark End of Season 10

    It seems that the event marks the end of Season X. The developers of the game, Epic Games, have decided to mark the end of the seasons by presenting major events within the game. But it has brought different doubts among the players regarding Season 11. Those updates usually bring some changes and tweaks to the game instead of removing the whole world and leaving the players unable to access.


    When the game will come back or whether it will return or not is unclear. (Since billions of dollars have been invested in the game by Epic, it is almost sure that it will come back). Meanwhile, players can watch the most popular live stream showing the black hole. Sometimes, it is expected to reveal what may happen in season 11.

    Fortnite Map Wiped Out By Black Hole to Mark End of Season 10

    Fortnite Map also wiped out everything else from its Twitter account and left users with no clue regarding what had happened to keep the secret. Fans were expecting a dramatic end of Season 10 as Epic teased that they are going to hold a huge “The End” event this weekend. A countdown timer also appeared in the game.

    When the timer reaches 0, players in the world had witnessed a giant meteor marked the end of the map and destroying everything in it. The screen was turned into a black hole for the players who fell off the world. It continued for everything which is left in the game.

    According to the Press Association, here are the further details of what has happened actually –

    The most popular Battle Royale game, Fortnite is well regarded for its huge live showpiece events and Epic Games, the developer, had already confirmed that the “The End” event is going to be held on October 13.

    Fortnite Map Wiped Out By Black Hole to Mark End of Season 10

    The players who entered the world on Sunday night had witnessed that the battlefield of a virtual island has been hit by meteor shower before the whole map turned into a black hole. Since then, any players who were logging on the game have seen a live stream of the black hole and no option to play.

    In order to mark the absolute blackout, all of the tweets have been deleted in the official Twitter account of Fortnite, along with the live stream of a black hole. Later on, the fans have retweeted the same for over 120,000 times.

    In this game, over 100 competitors fight for survival to be the last player standing. Unlike other Battle Royale games, it is split into seasons which take place several months and each new season starts with some in-game events.

    Many fans are now looking forward to seeing a large refresh of the island and the game before its comeback on the 11th season. It might start soon in the near future.

  • Fortnite Marks a Comeback with ‘Chapter 2’ reboot

    Fortnite Marks a Comeback with ‘Chapter 2’ reboot

    The ever-changing Battle Royale island of Fortnite has been gathering millions of players for over two years. It has come a long way over the years and it has become really dense and layered with its own past. Since the map was completely banished, Epic Games has completely revamped Fortnite with the whole new Chapter 2, which comes with a new location to visit.

    The brand-new island looks more untamed and wilder than before, with a lot of mountains, forests, and lakes to explore, but only fewer urban locales or city. It might change as the island will keep on evolving with new seasons and updates. The well-known flying battle bus will still be available to keep you going in the battle.

    Fortnite Marks

    Chapter 2 notably comes with several new features like swimming, fishing, pogo sticks, and new vehicles that you can use like boats. You can also dance with friends with new multiplayer emotes. It has a whole-new semi-automatic pistol, new weapons with a rocket launcher, and a better ability to hide in dumpsters and haystacks.

    Players can also pay for subscription battle pass to earn bonuses, such as character skins, a major highlight with beautiful blob creature. The battle pass really works quite differently in comparison to the last seasons.


    It has also changed the way you progress so you can do more things to earn experience, such as opening chests or even getting kills. You can earn an extra 1500 V-Bucks by completing goals when you pay 950 V-bucks.

    Fortnite Marks a Comeback with 'Chapter 2' reboot

    The transition between older to new seasons was a bit bumpy. Just after 4 AM ET, over tens of thousands of players were on the battle and Fortnite went down for server maintenance. The official Twitter account of Fortnite is back to normal and a major update has been available to be downloaded.

    But it was not playable at that time. Even though players tried to log in, they got an error message ‘servers not responding’. Around 2 hours later, the new chapter went to live finally.

    Before the recent reveal, Fortnite was subject to a long and dramatic in-game event in which the original island was removed and apparently got lost in a black hole. Later on, the game went down for around 2 days and left players with nothing to do more than just staring at the black hole.

    New features

    It showed a little hope of life along with revealing different numbers curiously. The real hint was seen from a leaked trailer on what to expect. There was no sign as to when a game might come back.

    The new chapter of the game was headed by season X which was launched in the first week of August, just after the exciting mech vs. kaiju battle and the Fortnite World Cup.

    From the very beginning, the season was quite controversial. By adding B.R.U.T.E.S, the all-powerful mechs, which were weakened dramatically after some outbursts from the players.

    Season X also marked the beginning of rift zones, which were unstable zones with their different visual styles and unique rules. Some of them were also based on other properties like Batman and Borderlands.

    The frequency of updates was quite fast for some players as it is not easy to keep up with every new change. But the significant and constant changes make more sense with the arrival of chapter 2.

    What were the aftereffects of the notorious black hole apocalypse?

    First of all, a rocket was launched from a cluster of buildings around the center of the island, Dusty Depot. The rocket shot into the sky directly and formed a huge rift. Then, it seemed to connect several other rifts that were littered around.

    Thereafter, the rocket started moving across the rifts and created absolute mayhem with several rockets traveling around the sky at the same time. Then, the rockets converged and created a new rift which led a meteor to crash and destroyed the island at the end.

    All that happened was really cool but the aftereffects of the event were even more interesting. After this type of event, the game normally experiences downtime for a while and the new season starts with whole new changes like a futuristic city and a volcano.

    However, things are way too different this time. The game remained inaccessible for several hours. It took a day to play Fortnite again after a major black hole event.

    You could just view the black hole and you had nothing left to do anything much along with spewing out some random numbers. Of course, hardcore players are desperately trying to find out why such numbers were displayed. They were hoping to decode when the game will actually continue and whether the all-new map is coming.

    The developer has not said anything to keep the public guessing. More interestingly, all the official tweets by Fortnite have been removed. So, players had nothing to do unless staring at the stream of the black hole.

    The Trello page of the developer is known to figure out in-game issues. But it was also empty except for a picture of the event. The game’s status just showed “anomaly detected”. It is an absolutely unparalleled type of blackout which has just increased the chaos.

    Fortnite

    Just after the launch of the fourth season in May, the game showed a meteor in the sky. All and players started guessing on what will happen. After a few days, huge craters were left across the island.

    A rocket was launched on the first 1-time event and created a huge rift in the sky. The situation was quite messy.

    Later on, the developer has significantly brought improvements to its in-game events while improving the scale. A mysterious cube was, then, arrived and rolled around the island eventually before being disappeared into the lake.

    It, somehow, had teleported the players to a new dimension. It was later seen massive snowstorms, volcanoes erupting, catastrophic earthquakes as well as alien runes floating.

    A huge robot was eventually built in the huge volcano and also led to an exciting battle between a Godzilla-type kaiju and a huge pink mech.

    Click here to read the next fortnight article.

  • Check Chrome Version and Update Google Chrome Manually

    Google Chrome is obviously the most popular browser and is the first choice of users on all platforms. For better security, it is important to keep it up-to-date and Google also releases a lot of major security updates all the year round for this browser. However, there are some people who wonder how to update Chrome as it doesn’t have any large update button around.

    The reason is simple. Google Chrome is designed to update automatically by default without any intimation. It doesn’t even tell you that it has been updated. But sometimes, it may not happen. In some cases, you might want to install updates on your own.

    By default, Google Chrome is set to update automatically on both Mac and Windows, by default. In this guide, we are going to discuss how to update the browser to the latest version. The way you can update Google Chrome varies as per the platform the browser is being used.

    It is quite easy to update Google Chrome on desktop as well as on iOS and Android. If you are one of the users looking to check the latest update, here are the detailed steps to do.

    Update Google Chrome on Mac or PC

    All the major Google Chrome versions get patched and updated regularly, including Google Chrome for macOS, Windows, Android, Linux, and iOS. Google rolls out a new major update almost every month or so and updates are synched in different platforms. Here are the steps to update Chrome on different devices.

    Chrome for PC

    Like several other browsers, Google Chrome is also designed to update by default on its own. If it doesn’t update due to any reason, there is also an option to do it on your own. There are two different ways to update Google Chrome – using the address bar on the app and Main Menu.

    Both of these methods are working on Mac, Windows, and Linux systems. Here are the methods to update Chrome on laptop or desktop –

    Method 1

    In this menu, you can use Main Menu on Chrome to check updates.

      • Open Google Chrome from the desktop.
      • Click on Main Menu on the upper-right corner of the window
      • Hover around the “Help” option in the drop-down menu
      • Click “Update Google Chrome” in the sub-menu. Click on “About Google Chrome” if it is not there.
      • If you choose “About Google Chrome”, the “About” page will open. The existing version will be displayed and you will be able to see the available update. Click the “Relaunch” option and wait for the browser to restart after installing the latest version.

    Check Chrome Version and Update

    Method 2

    This method is quite faster and you need to use the address bar of the browser.

      • Double click on the Chrome icon to launch the browser.
      • Enter “chrome://chrome/” and press “Enter” on the address bar.
      • Then, you will directly enter the “Help” page in Chrome. If there is an update available, click the “Relaunch” button and wait for the browser to install updates and restart.

    Method 2

    Checking availability for update

    Keep in mind that the recent version of Google Chrome tells whether the update is available or not. In order to check the availability for an update, go to the Main Menu on the top right corner.

      • If the menu icon is grey, it means the browser is up-to-date.
      • It will be green if an update has been offered for two days.
      • The update has been there for four days if it shows the orange icon.
      • If there is more than one week, it shows the red icon.

    Check Chrome Version and Update

    Update Google Chrome on Android

    Chrome is the default web browser on all Android devices. It comes with every Android device as it comes bundled with Google apps. Google Chrome is also set in Android to be updated automatically by default similarly with other Android apps. You will be required to update the browser manually via the Play Store app if automatic updates are off.

    Update Google Chrome manually on Android

      • First of all, tap on the Google Play icon on your Android device.
      • Launch the Google Play store, tap on the Main Menu icon on the top-left corner, which seems like a hamburger icon.
      • Next up, go to the side menu and choose “My apps & games”.
      • Apps that have been available and updates are pending will be featured in the “Updates” section. Over there, search for Chrome.
      • If it is listed with the Update button, tap on it.

    Also, the process of updating Chrome on desktop and Android is totally different. It doesn’t show availability for the update when using Chrome for Android. Therefore, you cannot change the setting for default update from automatic to manual.

    Update Google Chrome manually for iOS

    Similarly, like other platforms, Google Chrome for iOS is also set to update automatically by default. Just like the Android App, Chrome is unable to be updated from inside the app for iOS and you will be required to update the same via App Store. Here are the steps to update Chrome on your iPad or iPhone manually.

    Update Google Chrome manually for iOS

      • Launch the Apple App Store by tapping on its icon on the Home screen.
      • Simply tap the “Updates” button on the bottom of the screen.
      • Browse the updates pending for Chrome.
      • Tap “Update” button to install the recent version if it is listed there. It means the app is up-to-date if you are unable to find it.

    In some devices, you might need to confirm that you want to update. Just type your Apple ID and password if it prompts you to update the browser. In addition, Chrome also doesn’t show the availability of updates in iOS like on desktop. Hence, you cannot set the preferences for updates to manuals in iOS, too.

    Summary

    Users can decide how and when to install updates on Google Chrome for macOS, Windows, and Linux. You will also get notified whenever updates will be available. On the other side, you cannot set the updates on Chrome to manual on Android and iOS. Additionally, you will have to use the app store to update Chrome on both iOS and Android.

  • Samsung Galaxy Tab S5e hands-on review

    Samsung Galaxy Tab S5e hands-on review

    Smartphones have become inevitable in our world. Having an expensive smartphone has become a status symbol much like having a car. While tablets are not as trendy as much as they were before, Samsung has not given up on their dreams. It has recently launched Samsung Galaxy Tab S5e and has made the tablet pretty affordable too. We are going to see about the amazing features of this sleek device in Samsung Galaxy Tab S5e hands-on review.

    Samsung Galaxy Tab S5e hands-on review

    A tablet has to be stylish, affordable and it should be easy to handle. Apart from this, it should have many features which will make it great to use. You can get all these with the new Samsung Galaxy Tab S5e. Grab the tab today and have a great time using it. Let us see the features of the tablet one by one in this review.

    Affordable price!

    The Galaxy Tab S4 which was launched last year had a high price tag. It was not so affordable. Many of us dream about using an expensive-looking smartphone with stunning features. But the price would be so high that we have been postponing that dream. Not anymore. With the new Samsung Galaxy Tab S5e, we can now make our dream a reality.

    It is priced very reasonably yet it looks costly. Great, right! But this reduction in cost has not affected the quality of the tablet in any way. The LTE variant of Samsung Galaxy Tab S5e is Rs.39, 999 and its Wi-Fi only variant is available at Rs.35, 999.

    Sleek Design!

    The tablet features a sleek and stylish design. For some people, the design might be a little basic but it isn’t much of a problem. The tab is very thin and is just 5.5mm. You don’t have to worry about handling such a thin tab. It is very comfortable to grip it.

    The main issue that we face with a tab is that the big screen size of it makes it tiring to hold it for long periods. You won’t face this issue with Samsung Galaxy Tab S5e because it weighs only 400 grams! Your hands won’t experience fatigue while you are using this tab. The tab has a sturdy metal body.Samsung Galaxy Tab DesignThe right side of the tab has a power button which also functions as a fingerprint reader. Below this button, the volume rocker and the microSD or SIM card slot are found. The bottom has the USB-C port while you can locate the POGO pins on the left side.

    Unfortunately, the tab does not have a headphone jack. But there is an adapter that comes with the tab. This adapter can be used to connect the wired headphones via the USB-C port. Four speakers are present in the tab to give you a great audio experience. The top left corner has a camera.

    Stunning Display

    The tablet looks vibrant with a 10.5 inch AMOLED panel with a 16:10 aspect ratio. This means you can enjoy media content with a resolution of 2560×1600. There is enough space to place your thumbs while holding your tab.

    This is possible due to the absence of physical home and other navigation buttons on the bezel. If you are a gamer, then you are in for a visual treat with this tab. You can even read books on kindle and the tab makes it quite comfy. If you want, you can even buy a keyboard to use along with the Samsung Galaxy Tab S5e.

    This will allow you to use the tab like a laptop along with software like Dex Mode. The keyboard is a little tight on space but with time you will adjust to it. The absence of backlight makes it a little tough to type if you don’t have enough light.

    Performance of Samsung Galaxy Tab S5e

    The newly launched tab comes with a Snapdragon 670 chipset and a 4 GB RAM. This is good for a standard Android device. A 15W charger accompanies the 7040mAh battery and it takes three hours to completely charge the tab.

    The charge lasts long enough and there is nothing much to complain about. You can use it for even more than 14 hours. The internal storage of the tab is 64GB. But there are provisions to support 512GB microSD cards in the tab.Samsung Galaxy Tab S5e PerformanceThe tablet performs well when we are multitasking. But sometimes after prolonged usage, one might find some lags in the functions. The tablet comes with a pre-loaded Bixby digital voice assistant.

    With this feature, you can give voice commands to your tablet. There are some child safety features present in this amazing tab. Parents can use these to limit access to a few apps and information by their kids.

    Decent Camera!

    The tablet has a 13MP rear camera along with an 8MP front camera. You get autofocus with a rear camera but the flash is absent. If you wish to take pictures in low light, then this camera will not suit your needs. Videos can be recorded with 4K resolution but that’s it.

    You can’t expect much from the cameras in the Samsung Galaxy Tab. But you can take decent pictures and make video calls with a front camera. Full-featured Promo mode is absent in this camera. Overall, in terms of camera, it just gives an average performance. But most of us don’t use a tab for the purpose of taking pictures. So, this shouldn’t be a problem.

    If you are looking to buy a Samsung Galaxy Tab S5e, then we say you go for it. The price range is very low compared to other tabs and everyone can afford it. It is very good if you intend to use it for browsing, watching videos, Netflix and reading.

    Bottom Line

    The design, battery life, features are all enticing in this tablet. Its lightweight makes it much easier to handle. The user interface is great too! Enjoy the amazing features of the Samsung Galaxy Tab S5e by buying it as soon as possible. I hope you liked our review and if you enjoyed reading it, share it with others!

  • Sony Xperia 5 review

    Sony Xperia 5 review

    Sony is famous for its compact phones but now it’s not only compact but amazing also. Finally, Sony has introduced its all-new Sony Xperia 5. This time Sony is all set to give tough competition to the other smartphone valuable in the market with the all-new Sony Xperia 5. Additionally, the screen size of Sony phones was only increasing but this time Sony has decreased the screen size from 6.5 to 6.1 inches. Additionally, there are no changes in the diagonal ratio also.  This phone is also available in the same tall 21:9 aspect ratio.

    Sony Xperia 5 review

    As per the details available, this latest Sony phone is introduced with the 4k Resolution video feature but with the small screen, the resolution is too much although the 1080 p is quite too much for this latest release. Apart from the display, there are several other things that are required to be considered.

    Yes, not only the screen got decreased but also the battery capacity got affected. Yes, the battery capacity of this latest phone has also been decreased. However, the battery capacity decrease is only a few percents so there is nothing much dramatic.

    Apart from the software and such specification, the hardware part is giving tough competition to others. This compact device is Xperia is having all those features that other bigger smartphones available in the market are having.


    Additionally, the amazing part is that in this smartphone you are getting stereo speakers, micro SD slot, side-mounted fingerprint sensor, and dedicated hardware camera key – a staple of Sony smartphone design. If you compare the Xperia 5 with Xperia 1 then there is nothing different.

    The 5 is having everything that the 1 has. There are several other specifications of this Sony Xperia phone that you should know about. The specs include:

    Body:

    Sony Xperia 5 is introduced with an Aluminum frame; Gorilla Glass 6 on back and front; 158x68x8.2mm, 164g; IP65/68 ingress protection rating; Sony Xperia 5 review

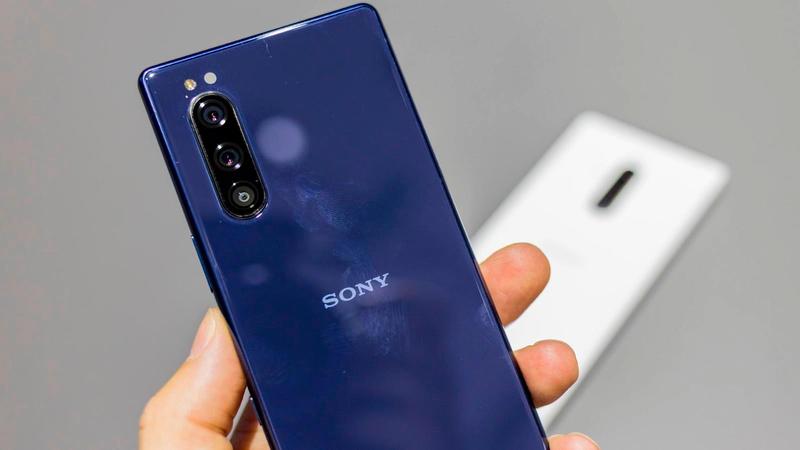
    Sony Xperia 5 Color options:

    This latest smartphone from Sony Xperia flagship has been introduced in the 04 color options including Blue, Red, Black, and Grey.

    Screen:

    Discussing the screen of the Sony Xperia 5 then, it is introduced with the 6.1″ OLED; 21:9 aspect ratio; 4K (1080x2520px); 449ppi; HDR BT.2020; DCI-P3 color space.

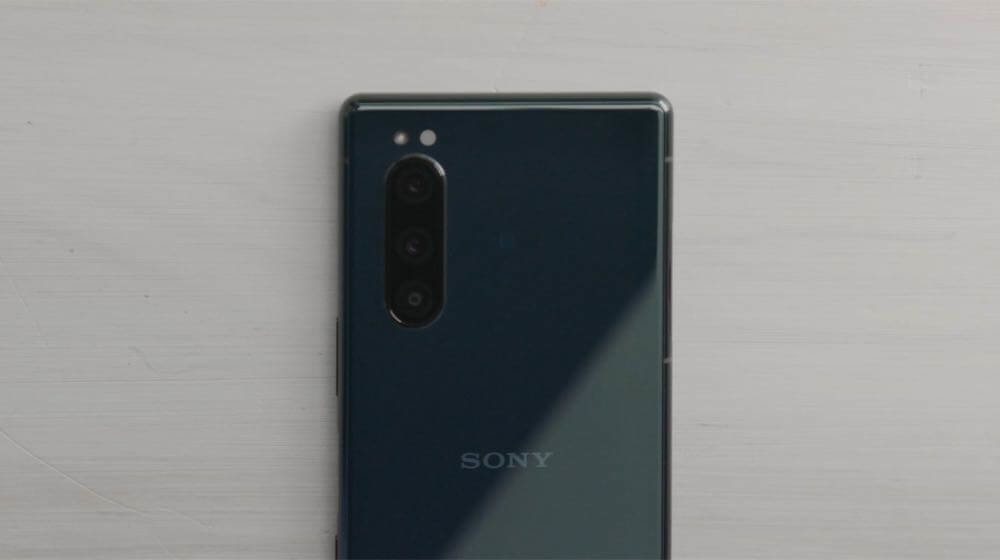
    Coming to the camera features then this phone of Sony Xperia flagship is also having the same 3x12MP camera configuration on the back. You can easily use this camera for the high-end phone trio of regular wide, ultra-wide, and short (2x) telephoto.

    Additionally, there are several other features revealed that include the Snapdragon 855 chipset. Yes, it is entitled to the Snapdragon 855 chipset as the full-sized version. Additionally, there are no midrange SoCs and the reason is the size of the smartphone.

    Rear cameras:

    The primary camera of the Sony Xperia 5 is of 12MP (1/2.6″ Exmor RS), f/1.6 aperture (ISO 3200), 26mm lens, Dual Photo Diode. Additionally, it comes with a Telephoto of 12MP (1/3.4″), f/2.4, 52mm lens. Apart from this for the Ultra-wide shots the 12MP (1/3.4″), f/2.4, 16mm camera is given.

    Additional camera features:

    There are several other additional features given in the Sony Xperia 5 smartphone including the Predictive Capture (Motion/Smile), Autofocus burst with up to 10 fps AE/AF tracking; Eye Autofocus; Predictive Hybrid Autofocus; anti-distortion shutter; Optical SteadyShot with Intelligent Active Mode (5-axis EIS + OIS); RAW noise reduction.

    Front camera:

    Coming to the front camera then the Sony Xperia 5 is packed with the 8MP (1/4″ sensor), f/2.0, 24mm lens, the fixed-focus camera that is OK.

    Chipset:

    Well, the processor and chipset play an important role and are important to consider as well. the Sony Xperia 5 is introduced with the Snapdragon 855 chipset, octa-core processor (1×2.84 GHz Kryo 485 & 3×2.42 GHz Kryo 485 & 4×1.8 GHz Kryo 485), Adreno 640 GPU.

    Memory:

    For better storage and performance, Sony Xperia 5 has been introduced with the 6GB of RAM, 128GB of storage. The internal memory of the device can easily be expanded up to512GB with the help of micro SD card support.

    OS:

    The operating system of this Sony Xperia 5 is also advanced. Currently, it is running on the Android 9.0 Pie version.
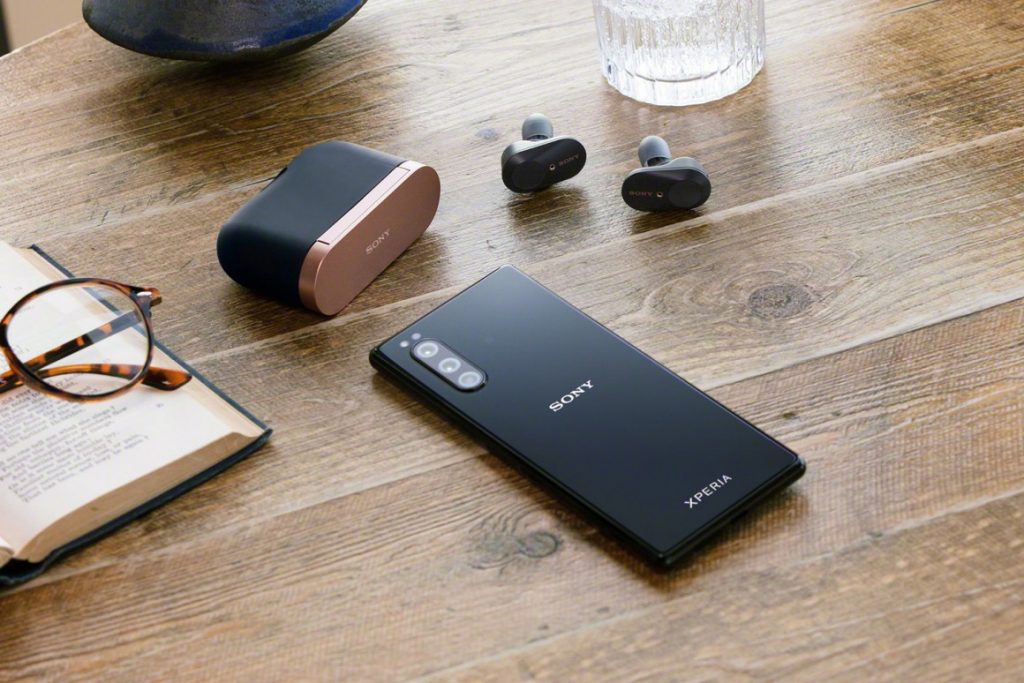
Sony Xperia 5 review

    Battery:

    There are some decrements in the battery part this time. But still, it is packed with the 3,140mAh Li-Ion battery. In order to provide fast charging, it is also packed with USB Power. It also includes the Smart STAMINA, Battery Care, and Xperia Adaptive Charging.

    Connectivity:

    For providing better connectivity, there are Dual-SIM/Single-SIM options available (market dependent) in this smartphone. Additionally the features 5CA LTE 4×4 MIMO, Cat.19 LTE (Up to 1.6Gbps download speed); USB 3.1 Type-C; Wi-Fi a/b/g/n/ac; GPS + GLONASS; Bluetooth 5.0; NFC are also included in this for the better connectivity.

    Audio:

    The audio features are available with the Hybrid stereo speaker setup along with the Dolby Atmos, DSEE HX, LDAC, and Qualcomm aptX HD.

    Sony Xperia 5 Misc:

    This latest smartphone is also packed with features including the Side-mounted fingerprint reader, X1 for the mobile engine, TRILUMINOS display. Additionally, the BIONZ X for mobile (Eye autofocus) is also given along with the Cinema Pro app for cinematic video recording experience.

    These are some of the amazing specifications of the latest smartphone by Sony. Some features of this latest smartphone are amazing and some are only satisfactory.  Talking about unboxing then the looks of this Xperia is quite similar to the Sony Xperia 1.

    Inside the box, there are some accessories also available including the USB-C headphones. In order to complete the order box of this latest smartphone, the 18W USB Power Delivery 3.0 adapter and a USB-C-to-C cable are also given.


  • Huawei Mate 30, 30 Pro, 30 RS

    Huawei Mate 30, 30 Pro, 30 RS

    When it comes to buying a smartphone, a customer or the consumer would consider all the important factors that comprise of a smartphone or the smart electronic device. There are millions of smartphones in the market with various specifications, features, similarities and differences and of course some are better and while some are not so better for purchase.

    Most of us prefer using the cheapest and an affordable smartphone that has got loads of features that one needs to use it for their daily purpose though. However, whenever we buy a smartphone, all that we consider is just the look, design, price, and a few important features such as RAM, memory, storage, internal and external, processor, built, its upgrades, etc

    Huawei Mate 30

    Well, you need to know that there is one such brand known as Huawei in the smartphone market that helps us with loads of benefits and features at the most affordable price though. However, even this particular brand has got a few different and variety of smartphone or probably the successor of previous phones and devices.

    You just have to look for the perfect smartphone that will come under your budget and of course with all the features and specifications that you are expecting.

    Here we have mentioned some similarities and differences about three models from the same brand Huawei, which is Huawei Mate 30, Huawei Mate 30 Pro and Huawei Mate 30 RS that consists of the Porsche designs overall. Just refer to the below-mentioned details and look forward to buying the best model for you

    Huawei Mate 30 vs. 30 Pro vs. Huawei Mate Pro 30 RS Porsche Design

    However, to help you better, we have gathered loads of information and have compared the smartphones with all of its best features and differences and of course with the prices too. Just refer and get the right piece. I hope the below things will be supportive of the people who all are looking for a long time.

    Display and Look

    The make of all the three smartphones is quite similar but there are a few differences that could differentiate from each other, otherwise, they are like identical twins. The front of Huawei Mate 30 and 30 Pro can be figured out with the front notches that both the smartphones have.

    Huawei Mate 30 Display and Look

    The displays are quite different from each other and when it comes to the Huawei Mate 30 RS Porsche design is actually divided into parts in the back panel. There is leather on the right side and glass in the middle area.

    Resolution

    The 3D facial recognition is something that you would find in the Mate 30 Pro and there is no such feature or an additional feature in the Mate 30 or in the Mate pro 30 RS Porsche design though. You simply can decide if you need a facial recognition device or just the normal model.

    The resolution of Mate 30 is quite high powered than Mate Pro 30 and even RS Porsche design has got an extraordinary resolution that one can be impressed for sure. You will see a 409ppi pixel density in the pro version and 338ppi in the Mate 30 version. Porsche Design has got the same pixel density of Mate 30 Pro.

    Camera

    The Huawei Mate 30 has got a triple rear camera whereas the Huawei Mate 30 Pro has got Cine Camera and a Quad rear camera. You will see that the pro model has got 3D sensors that can also work as the best feature for face recognition too.

    Huawei Mate 30, 30 Pro, 30 RS camera

    You can, not just use it for videography even for the slow-motion shots too. Porsche Design has again the Quad camera, with 3x optical zoom, with 32 MP Wide, LED, panorama, HDR and few extra features have been added as compared to Mate 30 and Pro 30.

    5G specialty

    When it comes to the connectivity and the network you can simply go on with the Mate 30 if you need 4G connectivity and if you are looking for 5G facilities then you can opt for Mate 30 Pro and 30 RS Porsche design that supports 5G LTE as well. Along with 5G, it also supports HSPA and GSM too.

    However, Mate 30 Pro and Porsche designs are quite expensive as compared to Mate 30 version. Well, you can choose accordingly to your needs for sure.

    Storage

    If it is about the storage, you need to know that the Huawei Mate 30 has 8GB RAM with 128 GB of storage and memory. If it’s about Huawei Mate 30 Pro has got 8GB of RAM along with 256 GB of ROM. When it comes to Mate 30 RS Porsche Design has got 12GB RAM and 512GB of ROM which is expandable up to 256 GB in the shared sim memory.

    Battery

    You will see that the Huawei Mate 30 comes with a great battery capacity that covers up to 4200mAh battery capacity and of course with a quick charger too. When it comes to Mate 30 Pro and RS Porsche Design from Huawei comes with 4500mAh battery capacity for sure. However, the pro version offers a little extra life as compared to the standard Mate 30 model.

    Cost

    Well, the device has not yet been launched and is soon to be arriving in the online electronic portals and websites. However, the experts are predicting Mate 30 to be in the range of Rs. 63,000, whereas the 30 Pro and RS Porsche Design would be approximately in the range of Rs. 72,000 and Rs. 165,000 respectively!

    Well, there may be some discounts or offers served for the first time buyers or the first customers, you can simply try for sure.

    Conclusion

    Hence, here we have compared all the specifications and features of all the three smartphones from the brand of Huawei which would be a great handset soon. You can simply decide and choose on which device to buy for your use. Just go through the comparison!