VLC is a highly popular media player. It has over 3 billion downloads since its launch, making it one of the most popular options of all time. The main reason behind its popularity is that it is open source and hence, available for free, and it is pretty sturdy. VLC has specific apps for Mac, iOS, Windows, Android, and more. The app is pretty intuitive and easy to use. In most cases, regardless of the file type, VLC is capable enough to play it for you. If you want subtitles, you would easily be able to find perfectly synced options out there. However, if you make adjustments and sync subtitles on VLC, it is an easy enough job.
How To Sync Subtitles In VLC On Windows PC
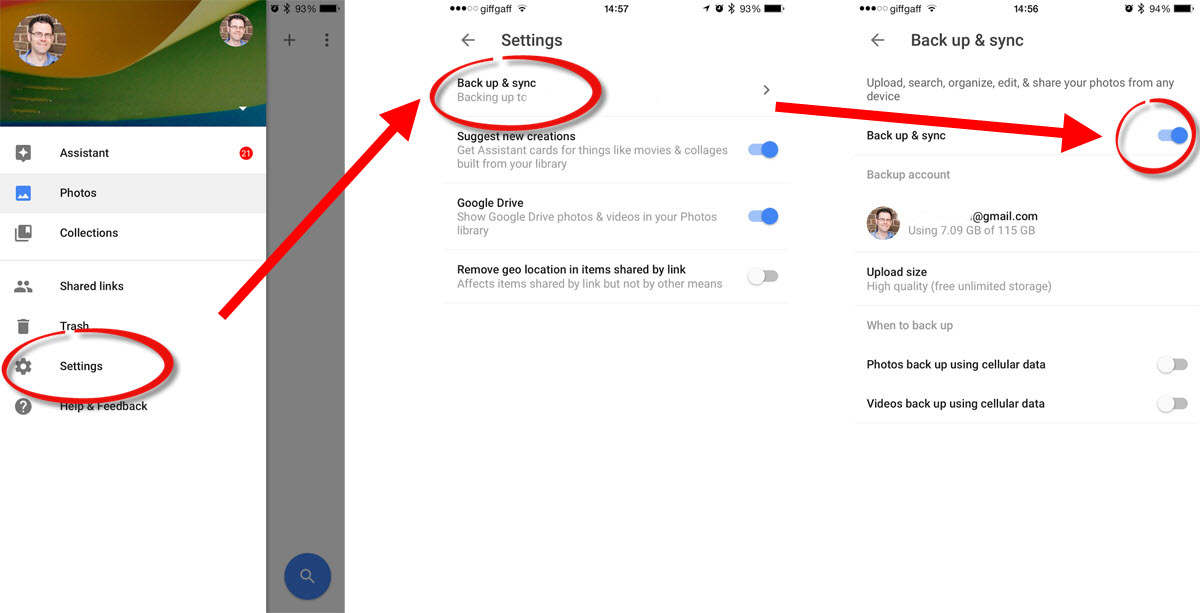
First, open the video that you want to see and click on ‘Subtitles’ and then ‘Sub Track’. This will let you know if the subtitles are enabled. Within Tools, click on ‘Track Synchronization’ Adjust subtitles under the Subtitle track synchronization option.
Syncing Subtitles in VLC on Mac, PC, iPhone, and Android Mobiles
During playback, simply press G or H to adjust the subtitle. It would be adjusted by 50 milliseconds every time you press. If the subtitle is behind in sound, press the G key and if ahead, press the key H.
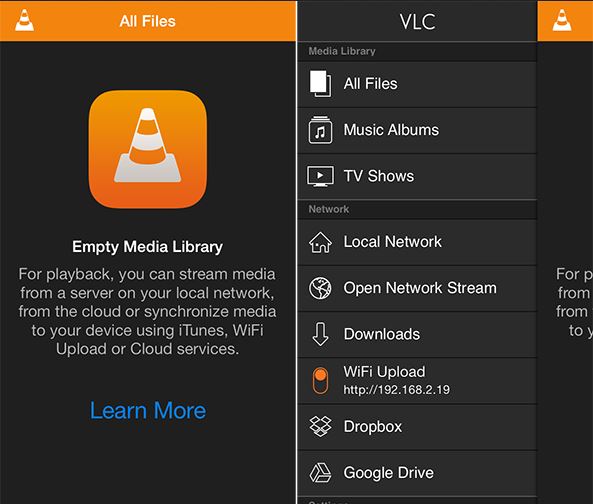
How To Sync Subtitles In VLC On Android Mobiles
Open the video you want and click on the balloon icon located near the play icon. Tap on ‘Subtitles’ track to see if the subtitles are turned on. Select the subtitle delay from the speech balloon menu. If it is ahead of the sound, tap on the plus sign (+) and if it is behind, click on the minus sign (-). Incidentally, if you want to use Spotify to listen to songs instead of VLC, here you go! Learn the latest.
How To Sync Subtitles On VLC On iPhone / iPad
Now that you know how to sync subtitles in Windows and Android phones, it is not really very different on iPhones and iPads. Open the video you want to watch and tap on the speech balloon icon located in the right bottom corner of the window. This will let you know if the subtitles are turned on or not. Tap on the clock symbol on the right bottom corner. You will see a menu come up. Within the ‘Subtitle delay’ option, use the icon and drag it to set the delay time. Pull it to the right to delay the subtitles. If the sound is ahead, pull the bar to the left.
How to Sync Subtitles in VLC
How To Sync Subtitles In VLC On Mac
It is easy enough to sync subtitles in VLC on Mac. Open the video you want to see and click on ‘Subtitles’ and then on ‘Subtitle Track’. Now, you will be able to see if the subtitles are turned on. Within the ‘Track Synchronization’ option, you will be able to see the ‘Subtitle Track Synchronization’ option. Use this to adjust and sync the subtitles. If it is ahead of the sound, key in a positive number to delay the subtitles. For the opposite, enter a negative number if the subtitle is behind in sound.
As you may know, Google allows all the developers to upload their app to the Play Store. There is no restriction of any kind. Since the app is scanned for malware after the app is uploaded, it is not very effective. However, the company has recently come up with a Play Protect program with the aim of protecting the users. There are many anti-malware apps that could help you protect against broken apps and more. Let’s take a look at the other ways how you can keep malware off your Android phone.
Google Play Protect
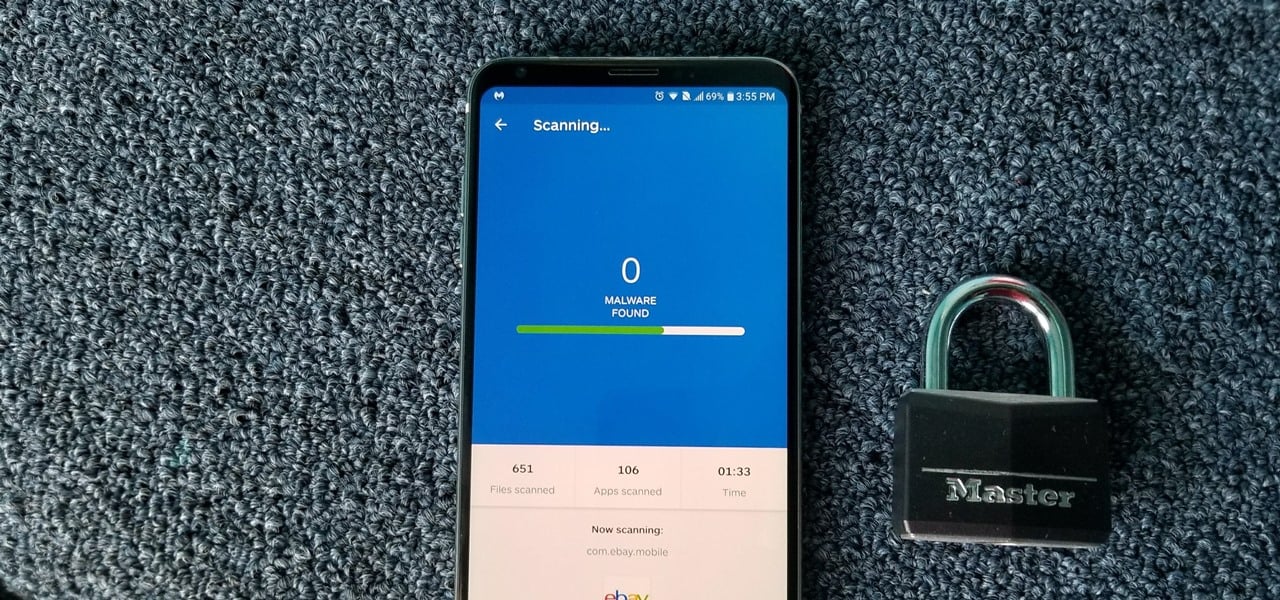
Google Bouncer is a way in which Google tries to keep a malicious app off the Play Store. This antivirus system scans all the apps for malware or malicious code. Play Protect is more thorough and scans each app individually. However, reports have emerged that it is only about 67% accurate, making it pretty ineffective. If you really want to protect your phone, install an antivirus app. Antiy AVL is a good option to use. It is so good that it has a 100% detection rate. The best part about this is that it does not kill your battery life! Your phone heating up could be an indicator of presence of malware as well.
Malware On Android Phone
Turn Off Unknown Sources
While the Play Store may not seem to be very secure, it is one of the most trusted places you can visit to download applications. Keeping in mind their policies, Android allows users to sideload apps from different sources. If you are using third-party apps, it is a great thing, but it is highly recommended that you make Google Play Store your first option. So, if you want to install apps from other unknown sources, you will first have to enable this in the Settings menu. Enabling this option would prevent the unauthorized installation of apps outside of the Play Store.
To disable the service, make your way to the Settings menu and select Security. Within there, you may find it the “Unknown Sources” option within “Lock Screen & Security” or “Privacy & Security”.
Review App Permissions
Android devices running on 6.0 Marshmallow and above use an app permission system that will offer access to specific smartphone functions. For example, Google Maps or other navigation apps would require GPS. Since the apps are not given permission by default, you will receive a request for permission the first time you use the feature. After you ‘Allow’ the app to access, it will be able to access it every time. It would be great if all the apps used this mechanism. Unfortunately, not all of them do. Some apps request bulk permissions as you install the app. If you don’t grant permission to all of them, you cannot install it.
Malware Off Android Phone
You can review the permission by heading over to the Settings menu and searching for “Configure Apps” or “App Permissions.” Here, you will see a list of the apps that you have given permission to. Keep your access permissions to a minimum so as to keep your phone more secure and off malware.
Abuse of family plans is nothing new. Netflix is famous for that and so is the popular music streaming service – Spotify. The company recently tried to reduce the abuse of this family plan by making it necessary for the users to provide access to their location data. At a very nominal rate, Spotify Family Plan allows as many as 6 users to use one account. However, sharing with friends and family is nothing new when we are talking about a streaming service. While this may work out pretty well for us, Spotify is losing millions. The Spotify family plan is designed for families and flat-sharing residences. But many abuse the intention and it feels like it is going out of limits.
Spotify Family Plan
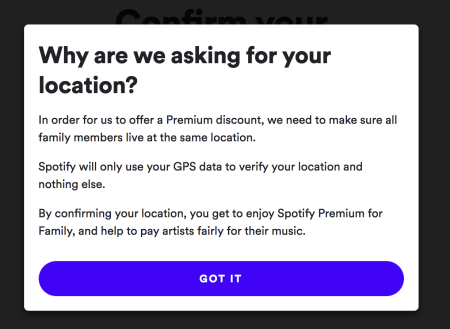
According to Spotify, all the users would be required to provide location access from time to time to ensure that there is no abuse of the family plan. The reason behind this is the fact that the family plan is based on a rule that all the users reside at the same address. By receiving location data from the same place, Spotify hopes to curb the problem. The company has already implemented this policy in the US. Users can accept the new terms within 30 days and continue using the streaming service or they can leave the platform. They are not playing around!
Spotify’s Point of View
Spotify supported their family plan policy. Many users were apprehensive of sending their location data due to privacy concerns. The company says that the data will only be to confirm the home addresses. It will be deleted immediately afterward. If the user wants to edit, they would be able to do so. If you want to protect yourself better, check out these tips.
The company’s statement reads as follows:
“The location data that is collected during Premium Family account creation is only used by Spotify for that purpose. Once verification of a family member’s home address is completed, we do not store their location data or track their location at any time.”
Spotify Location Policy
Is this a good idea?
If you share a family plan with 5 of your friends, it would probably come to a couple of dollars per person! While it sounds awesome, we should also think about the artists who work hard to bring you the music that you chill to. This is their livelihood and we don’t give them their due at all. Lots of people listen to podcasts, in fact, millions of us. However, all the revenue behind that is not reaching those who are giving us the service.
While celebrity artists might not face any issue over this, lesser-known artists are definitely struggling. To stop sharing and give them their due, click here to download Spotify and get started.
Conclusion
While this location sharing requirement is likely to exasperate Spotify users, it does feel like a good decision. This is because all the artists will now finally receive their reward. One major drawback to this idea is the potential lack of privacy breaches.
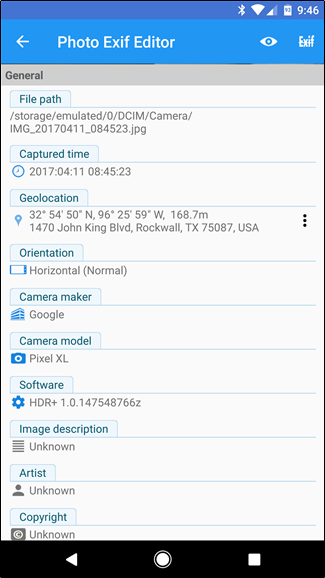
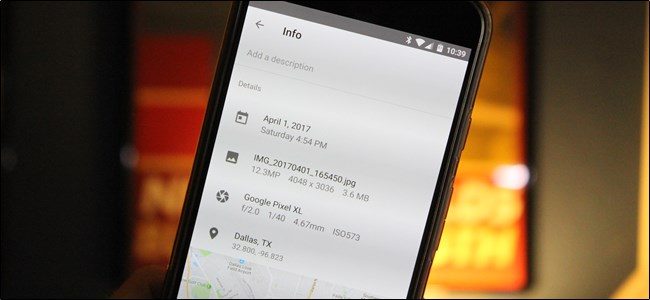
EXIF or Exchangeable Image Format is basically a group of data that is linked with every image you capture. Most smartphones add details like the shutter speed, the location, the mode in which the image was taken, the ISO, aperture data, and more. Now, this all seems great. But, there is still a pretty large problem looming here. When you put that cute photo up online, it could reveal your location. While popular social media platforms like Twitter, Facebook, and Instagram remove this data when you upload photos, other sharing options like Dropbox or Google Drive don’t. This is why you need to learn how you can view, edit, and remove a location and other EXIF data from your photos.
How to view, edit, and remove EXIF Data on Android
First, open Google Photos on your phone and open the photo for which you want to remove the EXIF data. Tapping on the i icon will give you all the EXIF data related to the image. If you want to remove the data, you will require the services of a third-party EXIF app, such as EXIF Eraser. Download and install the application. Open the EXIF Eraser app, choose the picture, and tap on ‘Remove EXIF’.
Remove EXIF Data
If you don’t want to do this, you could simply disable the option and not have the location data saved as EXIF data. You can do this by opening up your camera app and turning off the Store location data.
How to view and edit EXIF Data on iPhone and iPad
The images don’t store as much EXIF data on iOS, which comes as a bit of a surprise. Photo Investigator or Metadata Remover are good apps that could assist with viewing and removing EXIF data. Thanks to these apps, you can easily edit and remove the data. However, it is not free. You can try with Photo Investigator by opening up your gallery on the app. Choose the image and click on the icon below to see the EXIF data. To remove it, simply tap on Remove. However, this option will be presented only if you have paid for it. To know how you can set a custom name and profile pic, click here.
Apps to Remove EXIF Data
Let’s take a look at some of the most popular apps using which you can remove EXIF Data.
EXIF Purge: This handy app is great for removing EXIF metadata from multiple images simultaneously. With a single tap, you can get rid of any information you want.
EXIF Data Remover App
ImageOptim: This is pretty cool since it offers drag and drop functionality, the ability to reduce the image size, and is available in multiple languages. It is also effective in removing EXIF data including the GPS position and the camera’s serial number.
Photo Exif Editor: The app lets the users view, make changes, and remove EXIF data on any image you want. You would also be able to change the location! Another feature is its ability to batch edit photos.
With cloud and new tech coming out all the time, securing your privacy has become very important. One thing you should know before we jump in is that as long as you are going to use Google services, there is no sure-shot way of securing your privacy. However, by following these tips and modifying your privacy settings, you can secure yourself better and don’t have to hand over your personal information to a hacker on a silver platter! However, to be fair, Google is working to protect data. Take a look here!
Strong alphanumeric password
One of the first things to do is to set a strong password containing alphabets and numbers. While you will receive the option to use a PIN or a pattern to unlock your phone, an alphanumeric password is far stronger.
Biometric Authentication
While you can always unlock your device using your fingerprint, it is not advised, especially considering the legal grey area surrounding it.
Biometric Authentication
Disable Google’s tracking
Google thrives on data, which is why you should disable Google tracking ASAP. If you visit the Menu button, you will find the “Activity Controls” section. Here, you can disable search tracking, voice tracking, location tracking, and anything else you can think of.
Android Device Manager
Thanks to this, you would be able to locate your phone remotely. While this may seem like an excellent feature, this is definitely a privacy issue. While Google will have the location detail to help find your phone, on the other hand, Google knows a lot about you.
Encrypt your phone
This is a good option to consider for those having smartphones that are made by manufacturers who don’t encrypt the phone by default. One way to find out is to see if you require a PIN when the phone starts. If you do, the device is probably encrypted. You can always encrypt it by visiting the Settings menu and making your way to the Security option. Within this, tap on Encryption and select the ‘Encrypt Phone’ option. If it is already encrypted, you will see a status mentioning the same. If not, details on how you can do will be presented.
Two-factor authentication
You may think you have a pretty strong password but are the hackers just one password away from accessing all your personal data? This is why it is highly recommended that you enable two-factor authentication. You can do this for your Google account or any other account. These apps will help you protect your data as well.
Disable Google backup
Google automatically backups everything on your phone, ranging from apps, updates, and Wi-Fi networks, to passwords, history, and more. If you don’t want Google to have access to all this data, you can disable the backups by visiting the Backup and Reset option in the Settings Menu. You can disable it entirely or choose specific data that you don’t want to be backed up.
Privacy Settings
Hide notification information from the lock screen
This may seem like a pretty simple thing. But since Android shows alerts and notifications when your phone is locked, chances are that private data could be seen by other eyes. You can either hide sensitive content or hide the notification completely.
No one is ever immune to Android phone overheating. Most of us have experienced it at one time or the other. So, why does this happen and what can you do to stop it?
Reasons for Your Android Phone Overheating
Let’s take a look at some of the most common reasons why your phone might overheat. This does not refer to when your phone slightly warms up when you have been playing a heavy game for some time. This is when it gets too hot to touch. What could be some of the reasons?
Your phone could overheat if you have connected to a Bluetooth speaker for a long time or are overusing the phone. Did you know that phones having a high-quality camera can also heat the phone up? This is not true for all phones, but it could happen in some cases.
Android Phone Overheating
Other factors that could affect your phone could be the screen brightness, temperature, and long use of the camera. If your phone overheats quite high, chances are that you might see a warning. Using a case while using heavy-duty apps could also promote overheating, especially the cases made using plastic or leather.
If you tend to install apps from unknown sources, you should probably check for malware on your phone. This could be another reason for your phone overheating. Another possible cause could be your phone’s battery or the charging cable that you use. If you have an older model phone, it is advised that you don’t charge it completely. Stop when the battery level reaches 80 to 90%. Consistently charging to 100% could overheat your phone, especially with older phones.
It is a commonly believed myth that Wi-Fi could overheat your phone. While Wi-Fi by itself cannot be held responsible, overuse of Wi-Fi could certainly overwork and heat up your device. There are plenty of apps out there that could help you manage Wi-Fi or your battery. You will find great options here.
Why Your Android Phone Is Overheating
How to Cool Down Your Phone
Now that we have seen some of the reasons why your phone could overheat, let us take a look at how you could cool it down and keep it working efficiently.
The first thing to do would be to remove the case, especially if it like plastic or leather that can trap the heat. It is also a good idea to switch the airplane mode on so that all connectivity is disabled. If you are outside or if you have kept the phone under direct sunlight, remove it and keep it elsewhere. It would also be a good idea to not play heavy games like PUBG for a long time.
While you can use a fan to cool down your phone, never put it into a freezer or a cooler. That could have disastrous effects. Reducing the brightness could also help cool down the device. Other possible options to cool down your phone could include using the battery saver mode, cleaning all the junk in your, and disabling Bluetooth and Wi-Fi.
It is impossible that you would not have heard of YouTube, the world’s biggest and most popular video-sharing platform. It is completely free and is huge fun! If you feel your child is addicted to YouTube, here are a few ways you can make YouTube safer for children. Check them out. About 5 years back, YouTube released a feature that lets users download videos and later, watch it on their phones. This put an end to slow streaming and lagging videos. Most YouTube videos can be downloaded today, but for that, you would require a smartphone, such as an iPhone or an Android phone.
Videos cannot be downloaded on to your desktop. Once downloaded, you can view it in your saved folder within 30 days. One thing you should note here is that after the 30 days, the videos will continue to be present in the Downloads section. You will no longer be able to play them, but they will not be automatically deleted either. You will have to manually do this.
YouTube
Delete YouTube Videos
Downloaded YouTube videos are an ingenious idea. You can download them before you head out to areas that don’t have a strong connection or while traveling where there are chances of a spotty network. This is a great idea if you are traveling by flight. Over time, the data charges have come down quite a bit, but if you are going to binge, it is a far better idea to use your Wi-Fi to download the video and later view it offline rather than use your data and stream it online.
One potential downside to this is the fact that storing tons of high-resolution videos could eat up all your storage space. However, you can always delete the videos whenever you want. You can do this all together or one by one, as you wish. Let’s take a look at how you can nail this. If you want to install one or the other versions of YouTube, this is a good place to do it.
How To Delete All Downloaded Youtube Offline Videos At Once
To know how you can delete all the downloaded videos from the YouTube app, first open the app and tap on your profile. This should be located on the top right corner. Go to Settings and open the Downloads section. This will work for Android devices. If you are on an iPhone or iPad, make your way to the Offline section. You will find the Delete Downloads option. Clicking this will remove all the downloaded videos on your device.
How to Delete All Offline Videos From the YouTube App
If you don’t want to delete everything, there is a method with which you can delete specific videos. Let’s take a look at that in the next section.
How To Delete Downloaded Youtube Offline Videos One By One
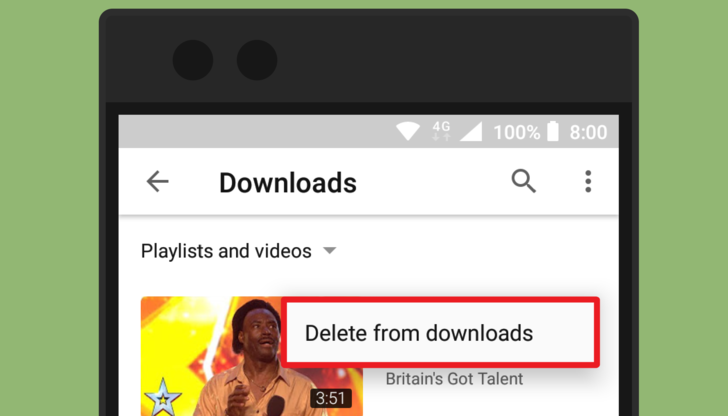
Open the YouTube app and click on the Library Tab located on the bottom right side of the screen. Within the Available Offline section, open the Downloads tab. You will be presented with a list of downloaded videos. Click on the three dots next to the video. Select Delete from the menu that shows up.
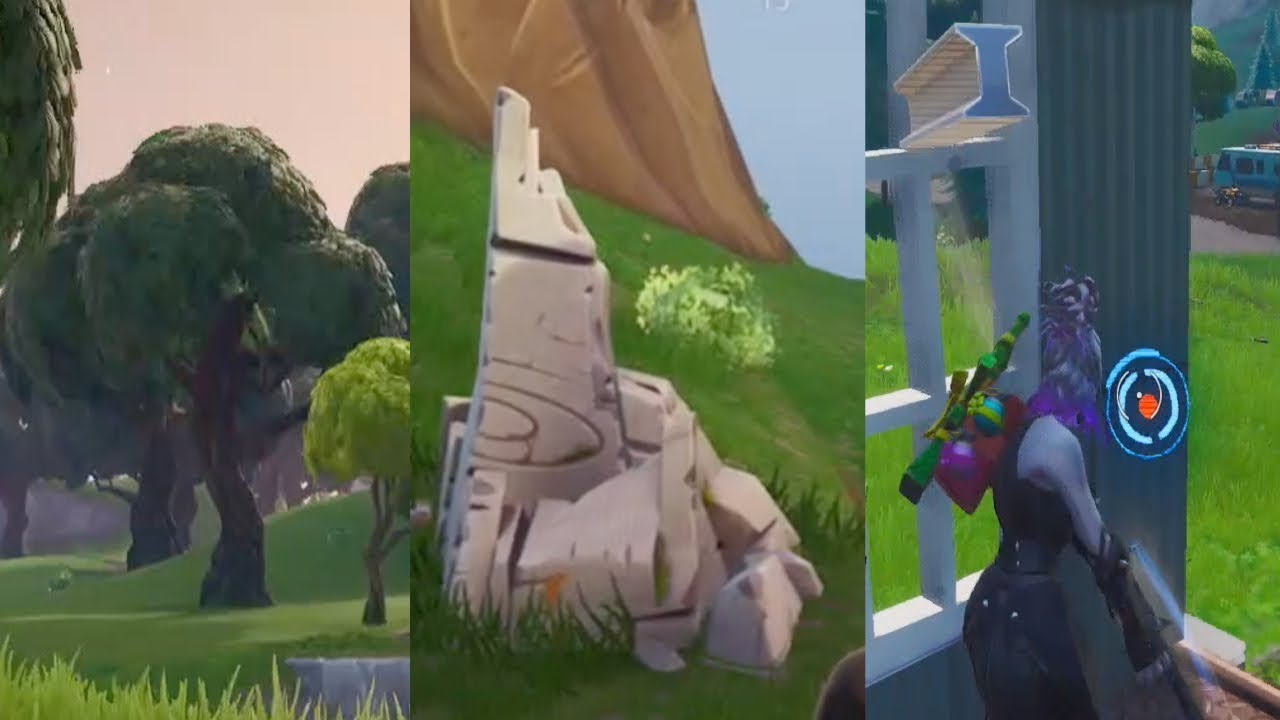
If you are a beginner to the world of Battle Royale, this post on tips should help you out. You are going to love this! It can feel uncomfortable to join a wildly popular game as a newbie, but these tips should help you understand the gameplay and jump in with a pretty good understanding. When you get going from the battle bus along with your 99 opponents, you will more confident than ever. This Fortnite beginner’s guide should help you make your way to the victory line.
Fornite has recently been in the news again! It looks like season 10 ended on a dramatic note with millions of players left staring at a black void. Check out our article for more information.
Fortnite For Absolute Beginners
Fortnite For Absolute Beginners
1. Jump out as late as possible
The very first advice is to jump out as late as possible from the battle bus. When the Battle Bus horn honks, it indicates that you can now jump down into the map. However, it would be to your advantage if you jump with the rest. Wait until the very last moment and then jump. The reason for this is that there would very few players, if at all, to race against to collect items and more. It also means less competition for getting stuff and higher chances of survival, especially considering that you are a newbie. Make way to some sort of structure, such as house as chances are high of finding some loot inside along with some shelter.
2. The glider deploys automatically
This might be a good time to point out that you cannot control the glider’s deployment. It happens automatically when it reaches a specific height. All you can do after you jump is to lay low and find shelter in the nearest structure.
3. Play with headphones on
Even if you are all alone, it is a good idea to play with your headphones on. This will give you a better chance of hearing gunshots or footsteps. Knowing where the others are coming from and where you can run off to could mean saving your life.
4. Things on Spawn Island
When you spawn into Spawn Island, you will notice ammo, guns, and building materials around you. While you would be able to pick them up, you cannot bring them onto the Fortnite Map. A better way of looking at it would be to consider Spawn Island as a practice area. Check out how you can use things that are new to you and practice shooting here.
Fortnite Spawn Island
5. Trees’ destruction
This is a very simple rule that you can follow. If you are using your ax to destroy trees to get building material, do not destroy them fully. Stop when the tree has 50 Health on its bar. This is because leaving a path of destroyed trees could easily point the other players to you.
6. Using your pickaxe
If you think you have done something silly, such as building construction around you, don’t panic. Your pickaxe is your best friend. With its help, you can destroy pretty much anything. One thing to note here is that the red circle icon that comes up indicates the noise you are making. If anyone is nearby, you are giving yourself away. Take it slow. Don’t worry, you will become better with practice. Chapter two reboot should give you plenty of practice!
7. Consuming potions in the bottles
As you make your way around the map, you will come across different sizes of blue bottles. The smaller ones will give you 25 Shield while the larger one awards you 50 Shield. To save space in your inventory, consume the smaller bottles first as you cannot have more if you reach 50 Shield. The larger bottles can be consumed regardless of your Shield level.
8. Weapons in your inventory
Another useful point about the inventory – store your weapons like guns, grenades, etc. in your inventory. If you want to smash your opponent’s cover or structure, using a grenade is pretty effective. Having healing and shields in the inventory will help if you are surrounded by enemy fire and need some help. You can also share them with your squad if they require it.
9. Harvest materials as you go
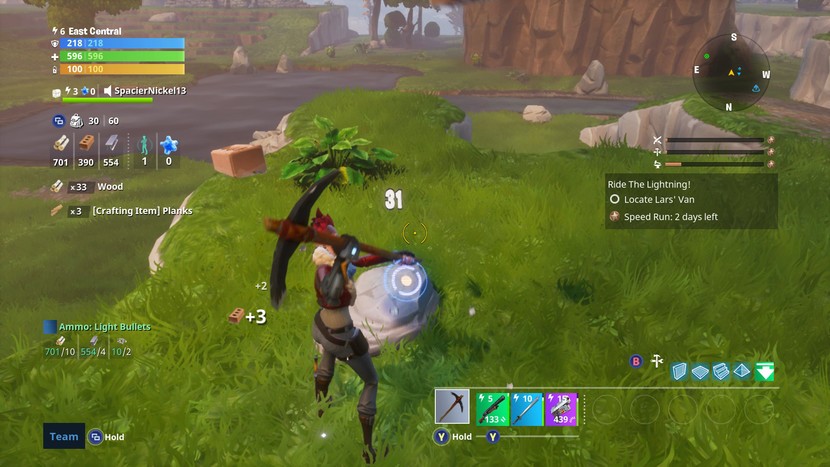
Having an excellent aim and building strategically are the two things that can help you win the game. To build, you will require materials that can be gained by harvesting material, such as wood. With this, you can put an end to trees, chairs, and anything else you can think of. Explore and find out which structure gives you the most materials and harvest them as you make your way across the map.
Fortnite Harvesting
10. Different kinds of bombs
There are many different kinds of bombs in Fornite. While it is known what grenades do, not every bomb reacts in the same way. Shadow bombs can help you hide for a few seconds as you gain an advantage over your opponents. There is also something called a Boogie Bomb which makes your enemy start dancing forcefully. True to its game, it looks like tiny disco balls. Here, you can comfortably take aim at them, but they would be too busy dancing to do anything!
11. Build Cover
There could be many reasons why you are building cover. But if you are hurt, it is HIGHLY advisable that you build walls around yourself before you heal. This is because healing and drinking potions could take some time to take effect during which you are vulnerable as you can’t do anything.
12. Playground Mode
This is very important. If you truly want to shine at Fornite, you should know the map inside out. For this, using Playground Mode is a good idea. If you are fighting against 99 players every time, there is no way you get to explore and learn the map. The Playground mode is an excellent way to explore all the areas and understand the cheats among other things.
For more tips and tricks on how you can play Fornite better, you really should check this application out.
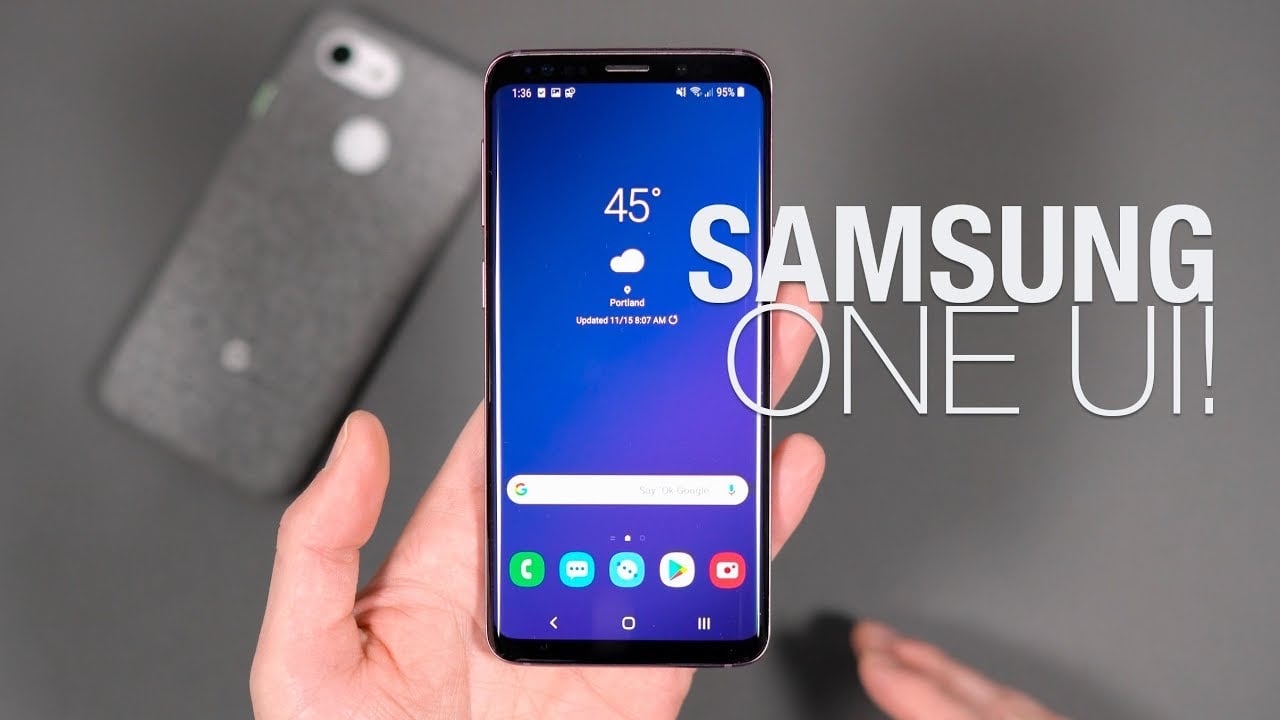
Samsung recently unveiled its UI revamp on its smartphones. Known as One UI, the latest Android skin from Samsung will be now used instead of its Experience UI. The new skin is a positive change and comes with a lot of nice surprises. With the software feeling lighter and fresher, you are sure to have a great experience. Let’s take a look at some of the awesome One UI features.
Best Samsung One UI Features
Enhanced One-Handed Usability
As the size of smartphones keeps increasing gradually, using it with one hand has become tougher. With One UI, the company hopes to work towards this problem. The revamped UI has a fresh interface and a user-friendly one that makes using the phone with just one hand pretty easy. In the new UI, the screen is split into two halves, where the top half has the viewing area and the lower half the interaction area. This can be seen in all the native apps. Now, you would be able to use the phone using these controls without straining yourself. Once you scroll down, the viewing area goes off, ensuring you get a good experience and without anything to disturb you. Overall, Samsung’s efforts have paid off and the one-handed usability feature is perfect!
Samsung One UI
Recycle Bin in Gallery
If you are not using Google Photos, you might have experienced frustration when you accidentally deleted some photos and there was no way of getting it back! Google Photos, however, allowed you to recover it from the trash within a certain time period. Keeping that useful functionality in mind, One UI has been designed to have the same feature in Samsung’s native Gallery app. Called the Recycle Bin, it is designed to save your deleted photos up to 15 days before deleting it forever.
Navigation Gestures
Samsung has also planned to design and release its own gesture navigation. Users can decide whether they want to use the traditional Android buttons or gesture navigation. You can go to the settings menu and enable it. Now, all you need to do is to swipe up from the bottom right to open the recent apps, from the bottom middle for home, and the bottom left to go back. You can also change this in the settings menu.
Battery Optimization Settings
The Optimize Settings option in Samsung is now seen in One UI. Here, you can enable the device to automatically reset the brightness, media volume, screen timeout and more at certain times to save battery. If you tend to keep these elements at high during the day, you could set them to turn it down during the night. This will enable you to save your battery life greatly.
New Camera Features
The camera app has undergone a change as well. Its new user interface has become more user-friendly and it is easier and simpler to use now. There is added support for HEIF format. Besides this, you can enable a setting that will let you open the camera based on the last mode that you were using.
Dark Mode
One UI has also implemented another feature, most requested by the users – the dark mode. Once enabled, it is implemented across the system and all the UI elements would be affected. This includes a dark Settings app, dark app drawer, dark notification panel, and more. It looks stunning, especially on Samsung’s higher-end phones, such as the Galaxy Note 10 Plus or the Samsung Galaxy S8, having the OLED edge-to-edge screen. Besides offering an awesome experience, it also provides us with a great viewing experience.
Samsung One UI Dark Mode
Smart Orientation
Since One UI is based on Android Pie, there are multiple features of the latter that you might see here. One of the most popular ones includes the smart orientation lock feature. Here, you will notice a small button on the lower half of the screen that you can change the orientation of the screen. Since you will not have to open the settings, it really is a handy feature.
New Icons and Design Elements
Coming to the aesthetics, the first we all notice are the icons of the apps. The icons still have a squircle shape, but they are so much better than how it was previously with Experience UI. The new rounded edges are seen everywhere and lend the UI a better look. Samsung has done quite a good job here with the design elements by changing it just the right way.
Lift to Wake
“Lift to Wake” is a common feature available in many smartphones. Basically, it works as the name suggests, the screen wakes up automatically as you lift the phone. If you have enabled Samsung’s face recognition or the iris scanner system to unlock the phone, you are in for a treat! Since this feature is designed to start scanning before the screen turn on, your phone is likely to wake up super fast.
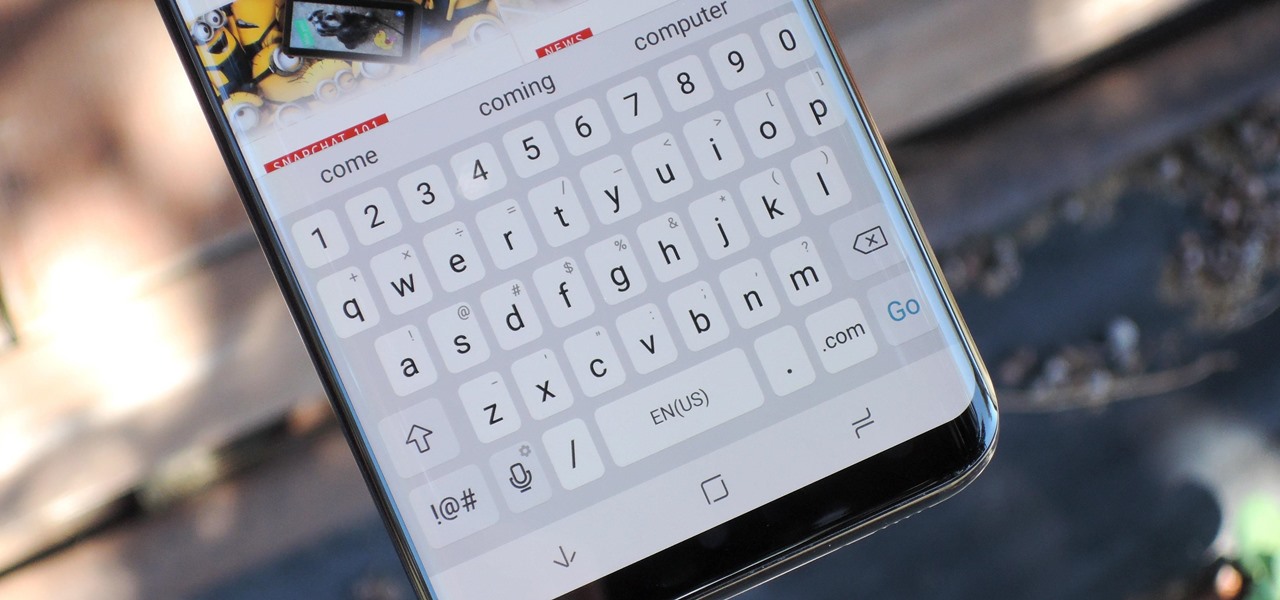
New Keyboard Features
Drawing to an end in this list of the awesome Samsung One UI features, we have the new keyboard features. With the “Floating Mode”, you can drag it to anywhere on the screen and start typing. The keyboard remains a bit transparent in this mode, making it awesome to use. If you want, you can change the size of the keyboard and even fiddle around with the transparency rating. With the Adaptive Theme option, the keyboard will change into a light or a dark theme based on the app’s color.
Samsung One UI Keyboard
New Animations and Animation Control
One UI has come up with a ton of new and better animation. You will come across this in multiple instances as you use your phone. The animations to launch the multi-task menu, drop down the quick settings panel, and animations to close apps all have bright and responsive animations, making it a delight to see them. The screenshot animation is also wonderful to see! If you are not very fond of active animation, you can reduce it by visiting the settings menu. While you cannot completely disable, you can definitely lower its vibrancy.
Fortnite is an online video game designed and developed by Epic Games. It was first released in 2017. In the final season 10 event of Fornite, the server went down. This left millions staring at a blank screen. The official Twitter account of Fornite tweeted “This Is The End”. Players believe that the gameplay map in this insanely popular video game will now be replaced with an entirely new setting. If you plan to start now, maybe these tips will help you.
Players and streamers alike were not able to log into their accounts. At the same time, fans around the globe were discussing and speculating if Fornite was actually coming to an end or was about to come back after a change. The powering down could not be construed as a mistake since it was intentional – a pretty easy thing to see. This is because there was a galaxy collapse animation for those streaming on in the lobby.
Fortnite announced ‘The End’
When Did This Happen?
Millions of Fortnite gamers were online when, on Sunday, this sudden incident took place. The sudden end occurred around 7 pm GMT when most of the elements associated with Fornite vanished in an instant. Everyone was left staring at the blackness as the entire world went dark.
Instead of just tweeting the official END tweet, the game developers deleted all of its 12,000 tweets, leaving only one behind. Fortnite’s Twitch account which has over 48 million followers is now completely silent.
What Exactly Happened?
The events began quite suddenly and were totally unexpected. The first sign was that of a rocket launching and exploding to create rifts. For those who know, this was similar to the Season 4’s in-game event. Next, the meteor on the island started showing signs of unrest. This had been static since the beginning of season 10. Many spacecraft flew into the rifts multiple times before the players were sent flying in the air.
Fortnite Black Hole
Gamers then started trying to decode the numbers that showed up near the black hole. Most players started using Google Maps to understand the location. The first numbers to appear took us to a crab cave. After that, more and more numbers have started showing up. Gamers believe this could give us an inkling into the next title and some hint about what we can expect from the next season.
The END
The final Fortnite season 10 event came to an end pretty suddenly with all the players’ screen blacking out. Instead, they now featured a black hole graphic. Millions of gamers tuned into their games or streams when they found out that they could no longer log in at all. The only available option is to hit the “Exit” button, which will take you out. But, you will not be able to log in again. Those who were playing the game saw the world collapse and breakdown. The status menu only showed “Anomaly Detected”.
It is not likely that Fortnite has come to an actual end since the popular battle royale game has a lot of potential and the developers know it. Instead, it looks as if the gameplay map used by the players since the release of the game will be replaced. Streaming has become so popular that gamers say they are earning more on Facebook’s streaming platform than on Twitch or YouTube.